Halloween is the perfect time to make your home feel fun, warm, and a little spooky. And one of the easiest ways to do that is with a carved pumpkin.
A pumpkin does not have to look like the same old jack-o’-lantern every year. With a few simple tools and a little creativity, you can make pumpkins that look cute, spooky, elegant, funny, or completely unique.
Pumpkin carving is also a fun DIY project for families, friends, and anyone who enjoys decorating their home for fall. Current pumpkin-carving guides show a wide range of styles, from simple faces and stars to animals, skeletons, nature-inspired patterns, and detailed designs.
In this guide, you will find 10 creative pumpkin carving ideas to DIY this Halloween, along with easy instructions, helpful tips, a comparison table, safety advice, and answers to common questions.
Whether you are a beginner or already enjoy pumpkin carving, there is an idea here for you.
Why Pumpkin Carving Is a Great Halloween DIY
Pumpkin carving is more than just making a Halloween decoration.
It can help you:
- Create a welcoming Halloween porch
- Add personality to your home
- Enjoy a fun family activity
- Make inexpensive seasonal decor
- Create a unique centerpiece
- Decorate your entryway
- Take beautiful Halloween photos
- Try a creative DIY project
You also do not need professional carving skills. Simple shapes can look great when a light is placed inside the pumpkin.
For a home-design website, pumpkin carving can also become part of a larger seasonal decorating plan. A few carved pumpkins can work with your front-door decor, porch lighting, fall flowers, wreaths, and other autumn accents.
10 Creative Pumpkin Carving Ideas at a Glance
| Idea | Style | Skill Level | Best Place |
|---|---|---|---|
| Classic Happy Face | Cute | Easy | Front porch |
| Starry Night | Magical | Easy | Entryway |
| Spooky Cat | Spooky | Easy | Porch |
| Pumpkin Monster | Fun | Easy | Kids’ area |
| Leaf Pattern | Natural | Easy | Dining table |
| Spider Web | Spooky | Medium | Front door |
| Moon and Bats | Halloween | Medium | Porch |
| Animal Pumpkin | Creative | Medium | Garden |
| Geometric Pumpkin | Modern | Medium | Indoor decor |
| Layered Haunted House | Detailed | Hard | Main display |
Now let’s look at each idea.
1. Create a Classic Pumpkin Face With a Modern Twist


The classic jack-o’-lantern never goes out of style.
But instead of making the usual triangle eyes and simple mouth, try creating a more playful face.
You could make:
- Big round eyes
- One raised eyebrow
- A smiling mouth
- Small teeth
- Heart-shaped eyes
- Funny crooked eyes
- A surprised expression
How to make it
First, choose a medium-sized pumpkin with a firm surface. Draw the face with a washable marker.
Cut the top or bottom carefully and remove the seeds and pulp.
Then cut along your design slowly.
For a modern look, keep the face simple. Large shapes are easier to carve and usually glow better at night.
Best for: Beginners and families.
Home decor tip: Place three pumpkins together with different facial expressions to create a fun porch display.
2. Make a Starry Night Pumpkin


Want something beautiful instead of scary?
Try a starry-night pumpkin.
This design uses small holes and star shapes to create a glowing night-sky effect. Good Housekeeping also highlights starry-night pumpkin designs using different-sized holes and LED lighting.
How to make it
- Clean the inside of the pumpkin.
- Draw small stars and circles on the outside.
- Use a suitable carving tool to make the openings.
- Make some holes larger than others.
- Place an LED light inside.
- Turn off the surrounding lights and enjoy the glow.
The different hole sizes make the light look like stars.
Best for: Modern homes, entryways, and elegant Halloween displays.
3. Carve a Spooky Black Cat


Cats and Halloween go together perfectly.
Instead of carving a face, create a simple cat silhouette.
You can carve:
- Pointed ears
- Large eyes
- A small nose
- Whiskers
- A curved tail
A black cat design can look especially beautiful beside a front door.
Easy idea
Use one large pumpkin for the cat’s body and a smaller pumpkin beside it. Add simple carved shapes to make the display look like a little Halloween scene.
Best for: Animal lovers and spooky home decor.
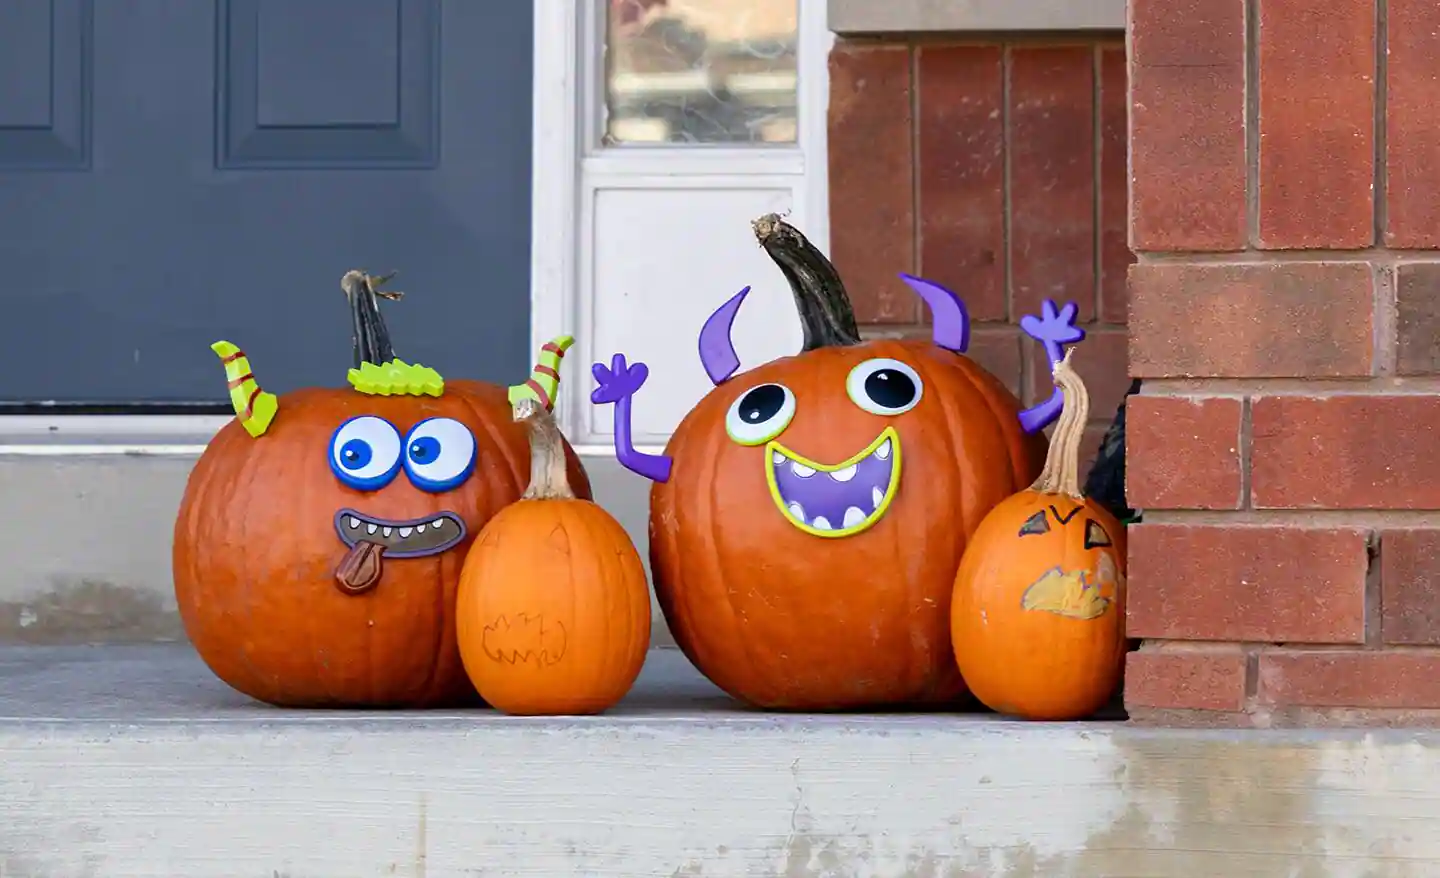
4. Turn Your Pumpkin Into a Funny Monster


A monster pumpkin is perfect if you want something funny instead of frightening.
Give your pumpkin:
- Big eyes
- Large teeth
- Uneven eyebrows
- A silly smile
- Small horns
- Funny ears
You can even attach safe craft materials around the pumpkin to make hair or other details.
Make it family-friendly
Keep the face funny rather than scary. Children can help draw the design before an adult handles the cutting.
This is a great idea for a family Halloween decorating project.
5. Try a Nature-Inspired Leaf Pumpkin


Halloween does not always have to mean ghosts and monsters.
For a more elegant home, try carving leaves, branches, or simple fall patterns.
This idea works especially well with home decor because the pumpkin can blend into your existing autumn decorations.
Design ideas
Try:
- Maple leaves
- Oak leaves
- Small branches
- Vines
- Acorns
- Simple flowers
Place several pumpkins with different leaf patterns on your porch.
Best for: Farmhouse, rustic, traditional, and natural home styles.
6. Carve a Spider Web Pumpkin


A spider web is one of the easiest ways to make a pumpkin look spooky.
Instead of cutting large sections out, create thin lines that form a web.
You can add a small carved spider in the middle.
Simple pattern
Start with a small circle near the center.
Then draw lines moving outward.
Connect the lines with curved sections.
Carefully carve along the pattern.
Add a battery-powered light inside and place a small toy spider on top if desired.
Best for: Front porches and spooky Halloween displays.
7. Create a Moon and Bats Design


A moon-and-bats pumpkin can create a classic Halloween scene.
Imagine a glowing pumpkin with a large crescent moon and several bats flying across it.
It looks especially good at night.
How to design it
Draw a large moon on one side of the pumpkin.
Add three or four small bats around it.
Keep the bat shapes simple because tiny details can be difficult for beginners.
Use an LED light inside to make the moon glow.
Decorating tip: Place this pumpkin beside a few smaller plain pumpkins for a balanced display.
8. Make an Animal Pumpkin


Why stop at Halloween faces?
You can turn a pumpkin into an animal.
Some fun choices include:
- Owl
- Fox
- Bat
- Rabbit
- Cat
- Dog
- Mouse
- Deer
Animal-inspired pumpkin designs are also a good choice for people who want seasonal decor without making their home look too scary.
Martha Stewart’s current pumpkin design collection includes nature and animal-inspired designs such as fox and hare patterns.
Beginner tip
Choose an animal with a simple outline.
Do not start with a highly detailed design. A recognizable silhouette can look better than a complicated design with too many tiny cuts.
9. Try a Modern Geometric Pumpkin


If your home has a modern or minimalist style, geometric pumpkin carving may be perfect for you.
Instead of faces, use:
- Triangles
- Squares
- Circles
- Lines
- Diamonds
- Repeating patterns
The result can look more like modern art than traditional Halloween decor.
How to style it
Choose pumpkins in similar sizes.
Carve a different geometric pattern into each one.
Place them in a row along your porch steps or entryway.
This creates a clean and organized display.
Best for: Modern, minimalist, and contemporary homes.
10. Create a Mini Haunted House Pumpkin


Ready for a more detailed project?
Try carving a small haunted house into your pumpkin.
You can include:
- A tiny house
- Windows
- A door
- A moon
- Bats
- Trees
- A fence
This design takes more time, but the final effect can be amazing.
Make it easier
Do not try to carve every tiny detail.
Start with the main outline of the house.
Then add a few windows and doors.
Use shallow cuts for smaller details so light can shine through without removing large pieces.
Best for: Experienced pumpkin carvers.
Pumpkin Carving Ideas by Skill Level
Not every design is suitable for every person.
Use this table to choose a project that matches your experience.
| Skill Level | Good Ideas | Approximate Difficulty |
|---|---|---|
| Beginner | Classic face | Easy |
| Beginner | Starry night | Easy |
| Beginner | Monster | Easy |
| Beginner | Leaf pattern | Easy |
| Intermediate | Spider web | Medium |
| Intermediate | Moon and bats | Medium |
| Intermediate | Animal design | Medium |
| Intermediate | Geometric design | Medium |
| Advanced | Haunted house | Hard |
The best design is not always the most complicated one. A simple design that fits your pumpkin and skill level can produce a better result than a difficult pattern that is hard to carve. Current DIY guides similarly recommend choosing designs based on experience and using simpler patterns for beginners.
What You Need for Pumpkin Carving
You do not need a large collection of tools.
Here are the basics:
| Tool | Purpose |
|---|---|
| Pumpkin | Main material |
| Marker | Draw the design |
| Pumpkin scraper | Remove seeds and pulp |
| Small carving tool | Cut designs |
| Spoon | Clean the inside |
| Paper or newspaper | Protect your work surface |
| LED candle | Light the pumpkin |
| Design template | Help create detailed shapes |
A pumpkin carving kit can make detailed work easier, but beginners can start with a simple set of suitable tools.
How to Choose the Right Pumpkin
The pumpkin you choose can affect the final result.
Look for a pumpkin that:
- Feels firm
- Has no large soft spots
- Has a strong stem
- Sits flat
- Has enough space for your design
- Matches the size of your pattern
A wide pumpkin works well for faces.
A taller pumpkin can work well for vertical designs.
Small pumpkins are useful for creating groups or table displays.
How to Carve a Pumpkin Step by Step
If this is your first time carving a pumpkin, follow these simple steps.
Step 1: Choose Your Design
Decide what you want to make before cutting.
You can draw your own pattern or use a template.
Step 2: Prepare Your Work Area
Cover your table or floor with newspaper or another easy-to-clean covering.
This makes cleanup much easier.
Step 3: Clean the Pumpkin
Cut an opening and remove the seeds and stringy pulp.
Scrape the inside until it is reasonably clean.
Step 4: Draw Your Pattern
Use a washable marker to draw the design.
Do not make the design too complicated if you are a beginner.
Step 5: Start With Small Cuts
Follow your design carefully.
Take your time rather than trying to cut everything quickly.
Step 6: Clean the Edges
Remove loose pieces and check your design.
Small corrections can make the final pumpkin look much cleaner.
Step 7: Add a Light
Use a battery-powered LED candle or pumpkin light.
LED lighting is a useful choice for Halloween pumpkins because it avoids the open flame associated with traditional candles. Martha Stewart also recommends LED or battery-powered lighting for pumpkin displays.
How to Make Pumpkin Carving Easier
Here are some simple tricks that can save time.
Plan before cutting
Draw your design first.
Once you cut the pumpkin, it is difficult to undo the mistake.
Keep designs simple
Large eyes, wide mouths, stars, leaves, and simple silhouettes are easier to carve.
Use templates for detailed designs
Templates can help you create cleaner shapes.
Cut slowly
Do not force your tool through thick pumpkin sections.
Think about lighting
Your pumpkin needs enough open space for light to shine through.
Pumpkin Carving Safety Tips
Pumpkin carving involves sharp tools, so safety should always come first.
Keep these tips in mind:
- Use a stable work surface.
- Keep your hands away from the cutting path.
- Cut slowly.
- Do not rush.
- Children should have adult supervision.
- Keep sharp tools away from young children.
- Use LED lights instead of open flames when possible.
- Clean up tools immediately after the project.
The Spruce and other pumpkin-carving guides also emphasize preparing a stable workspace and taking care when using carving tools.
How to Make Your Halloween Pumpkin Display Look Better
One pumpkin can look nice.
But several pumpkins can create a much stronger home display.
Try grouping pumpkins by size.
For example:
Large pumpkin + medium pumpkin + two small pumpkins
Then add:
- Fall leaves
- Small lanterns
- Hay or natural textures
- Potted mums
- A fall wreath
- Warm outdoor lights
You can also create height by placing small pumpkins on steps or raised boxes.
For a more elegant look, keep your color palette simple.
Orange pumpkins can be mixed with white, cream, green, or natural autumn colors.
Creative Pumpkin Display Ideas for Your Home
Your carved pumpkins do not have to stay on the porch.
Try placing them in different areas of your home.
| Location | Pumpkin Idea |
|---|---|
| Front porch | Spooky face |
| Entryway | Leaf design |
| Stairs | Small pumpkin group |
| Dining table | Mini pumpkins |
| Fireplace | Moon and bats |
| Kitchen counter | Small animal pumpkin |
| Garden | Cat or owl |
| Patio | Starry night pumpkin |
This is especially useful if you want your Halloween decorations to feel connected to the rest of your home design.
Common Pumpkin Carving Mistakes to Avoid
Even simple mistakes can ruin a pumpkin.
Choosing the wrong pumpkin
A soft or damaged pumpkin may break while carving.
Making the design too detailed
Tiny lines and very small shapes can be difficult for beginners.
Cutting too quickly
Fast cutting can lead to uneven shapes or accidental breaks.
Removing too much pumpkin
Thin walls can become weak.
Ignoring the light
A beautiful design may not look good if there is not enough light inside.
Waiting until the last minute
Detailed designs can take longer than expected.
Plan your project before Halloween night.
Can You Decorate a Pumpkin Without Carving It?
Yes.
If you do not want to use sharp tools, you can paint or decorate your pumpkin instead.
Popular alternatives include:
- Painting
- Stickers
- Ribbons
- Faux leaves
- Markers
- Decorative fabric
- Small accessories
No-carve pumpkin decorating is also a major part of current Halloween decor content, especially for people who want less mess or want to avoid using knives.
You can read more home styling ideas on Ideas Home Accessories, especially if you want to combine seasonal decor with your everyday home style.
How to Choose the Best Pumpkin Carving Idea
Ask yourself four simple questions:
- What is my skill level?
- Where will I display the pumpkin?
- Do I want cute, spooky, or elegant decor?
- How much time do I have?
If you are a beginner, start with a simple face, stars, leaves, or a geometric pattern.
If you have more experience, try an animal, moon scene, or haunted house.
Quick Comparison: Which Pumpkin Idea Should You Try?
| If You Want… | Try This |
|---|---|
| Something easy | Classic face |
| Something cute | Monster |
| Something elegant | Leaf pattern |
| Something spooky | Spider web |
| Something magical | Starry night |
| Something modern | Geometric design |
| Something family-friendly | Animal pumpkin |
| Something dramatic | Moon and bats |
| Something detailed | Haunted house |
| Something unique | Custom animal design |
Frequently Asked Questions
What is the easiest pumpkin carving idea for beginners?
A simple jack-o’-lantern face is one of the easiest choices. Large eyes and a simple mouth are easier to cut than tiny detailed patterns.
What are some creative pumpkin carving ideas?
Some creative ideas include starry-night pumpkins, animal designs, spider webs, geometric patterns, moon-and-bat scenes, leaf designs, monsters, and miniature haunted houses.
What should I put inside a carved pumpkin?
A battery-powered LED candle or pumpkin light is a convenient option. It gives the pumpkin a glow without using an open flame.
How early should I carve a pumpkin before Halloween?
Try to carve it close to Halloween so it stays fresh. A carved pumpkin can deteriorate faster than an uncut pumpkin, especially in warm conditions.
Can kids carve pumpkins?
Children can participate in pumpkin decorating, but adults should handle sharp carving tools. Younger children can safely help with drawing designs, removing seeds with supervision, and decorating.
What is the best pumpkin for carving?
Choose a firm pumpkin with a strong stem and a flat base. A pumpkin with enough surface area makes it easier to create your design.
Can I carve a pumpkin without a stencil?
Yes. You can draw your own design directly onto the pumpkin using a washable marker.
How can I make my pumpkin look better at night?
Use an LED light inside and choose a design with openings that allow enough light to pass through. Grouping several pumpkins together can also create a stronger display.
Final Thoughts
Pumpkin carving is one of those simple Halloween traditions that can make your home feel completely different.
You do not need expensive decorations or professional carving skills. A pumpkin, a simple design, a few tools, and a little patience are enough to create something special.
If you are new to pumpkin carving, start with an easy face, stars, leaves, or a simple geometric pattern. If you want a bigger challenge, try an animal, moon-and-bats scene, or haunted house.
The most important thing is to choose a design that fits your home, your style, and your skill level.
And remember, Halloween decor does not have to be scary. A beautiful pumpkin display can be cute, cozy, elegant, spooky, or playful.
Choose your favorite idea, get your pumpkin ready, and make your own Halloween decoration this year. 🎃