
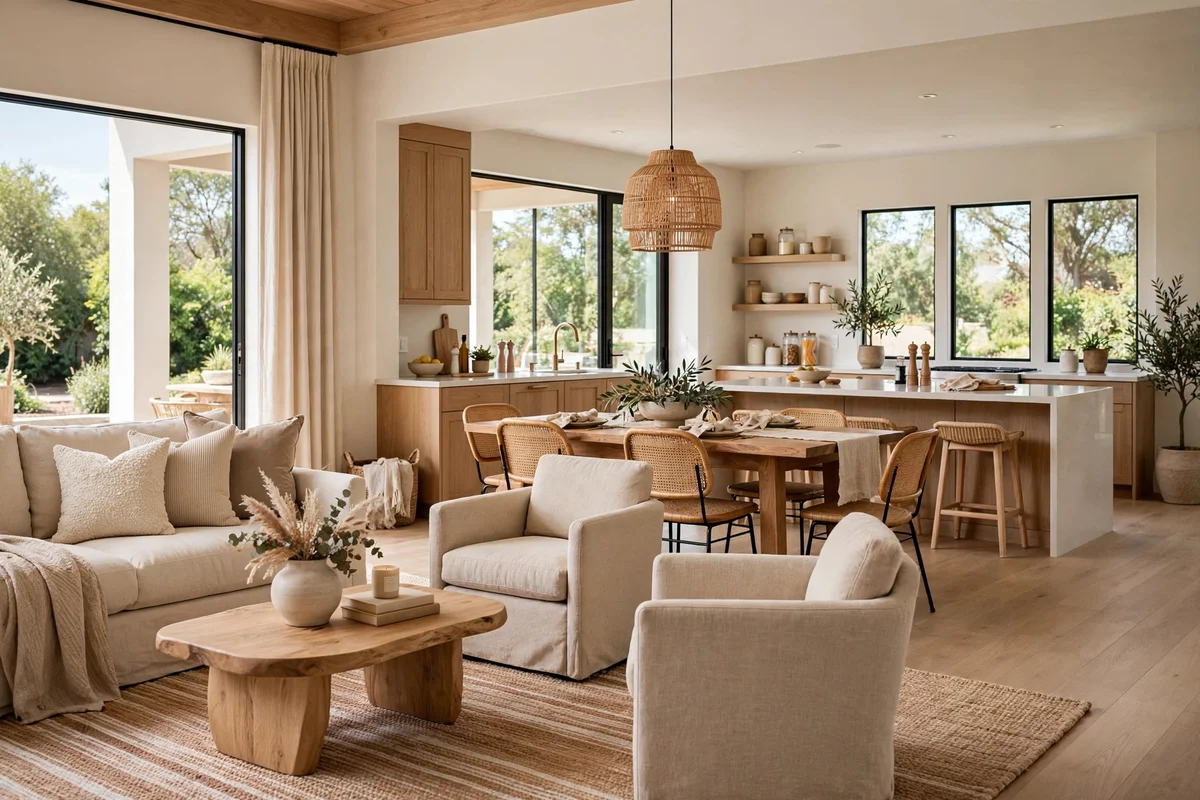
An open-plan layout gives you light, airflow, and the freedom to rearrange your life whenever you want. What it does not give you — at least not automatically — is structure. Without walls, the sofa drifts toward one end, the dining table ends up in a forgotten corner, and the whole footprint starts to feel like one large, in-between room instead of the home you imagined.
The fix is not to rebuild the walls you just knocked down. It is to define living zones: smaller, purpose-built areas inside the open footprint, each with a clear job. When the lounge, dining, work, and entry areas each have their own visual boundaries, the space reads as organized and intentional rather than vast and undefined. Devices are the toolkit; the order you deploy them in is its own discipline — our open plan living zone decor ideas guide runs the build sequence, from the zone map and tape tests to the closing audit.
The catalogue’s working instruments: a rug sizing table (lounge rugs at 8×10 or 9×12 feet; a dining rug extends about two feet beyond the tabletop on every side), a console that sits one to two inches below the sofa back, and shelving that leaves roughly a third of its cubbies open.
In this guide: Anchor Each Zone With a Generously Sized Rug · Float the Sofa and Let Its Back Be the Divider · Give Every Zone Its Own Lighting Layer · Paint a Color Zone Without Painting the Whole Room · Use Open Shelving as a See-Through Divider · Set a Console Table Behind the Sofa · Hang Curtains or Fabric Screens as Flexible Walls · Divide With Tall Plants and Planter Groupings · Use the Ceiling to Say “This Is a Room” · Add a Half-Height Partition or Slatted Wood Screen · Frequently Asked Questions About Open-Plan Living Zones · Conclusion
1. Anchor Each Zone With a Generously Sized Rug
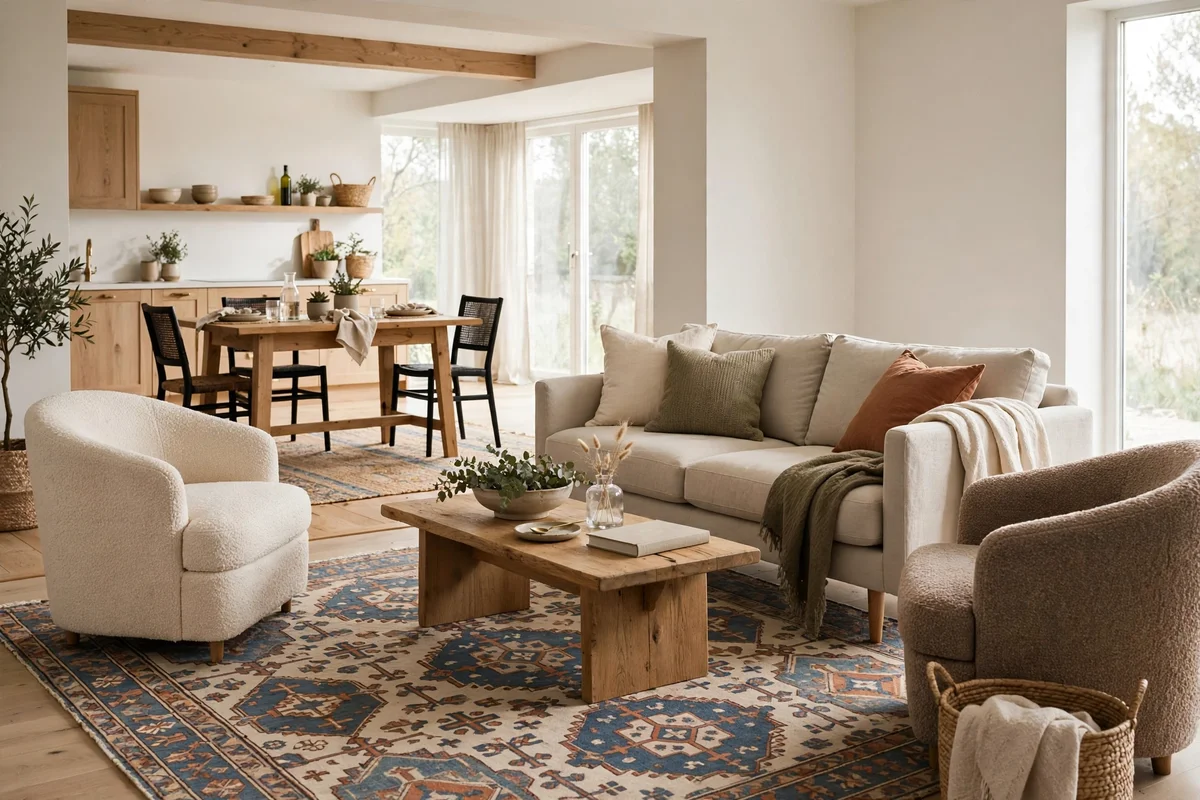
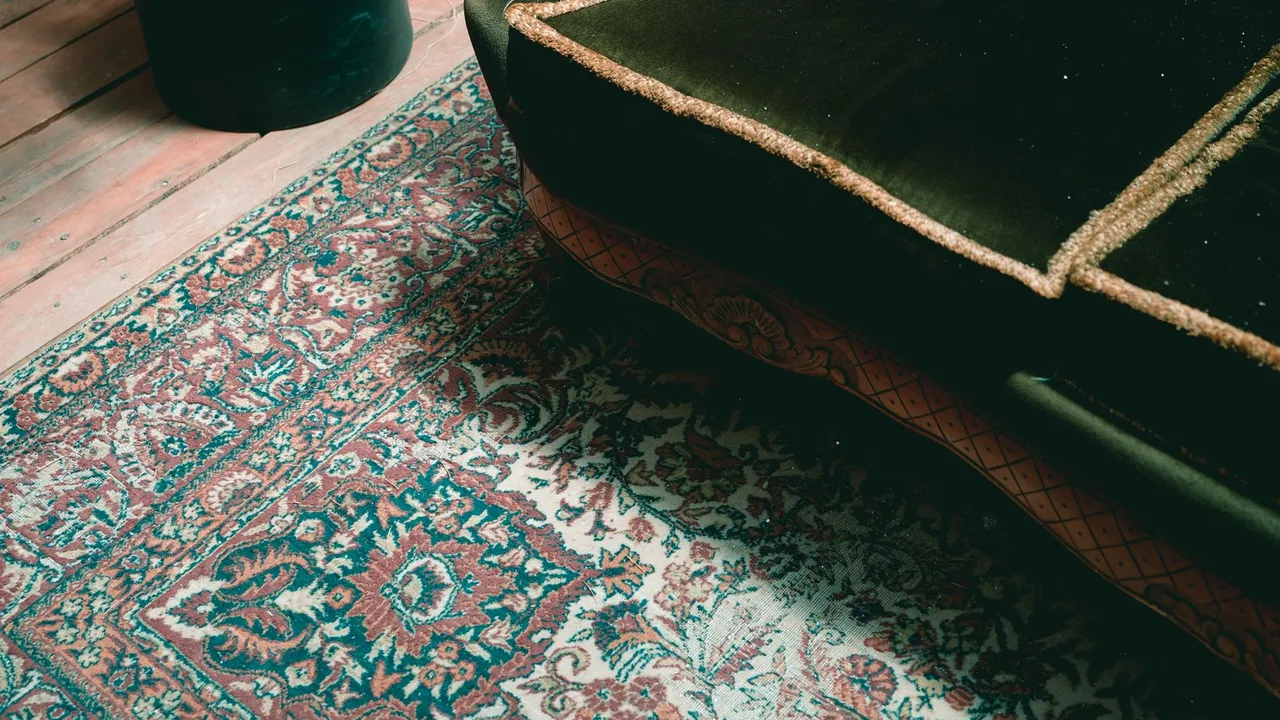
A rug is the simplest boundary in open-plan design because it draws a line on the floor without touching the ceiling. Place a large rug under your seating group and another under the dining table, and the eye instantly reads two distinct rooms — even though nothing stands between them.
Why scale matters more than pattern
The most common rug mistake in open plans is going too small. A rug that sits only under the coffee table, with every chair leg stranded on bare floor, makes the zone feel accidental. Size up until at least the front legs of the sofa and every accent chair rest on the rug; for dining, the rug should extend roughly two feet beyond the tabletop on all sides so chairs stay on it when pulled back.
Coordinating multiple rugs
You do not want identical rugs fighting for attention. Choose rugs that share an undertone — warm or cool — but differ in pattern or texture: a flatweave jute in the lounge and a low-pile patterned rug under the dining table, for example. Leave a strip of bare flooring between the two rugs to create a clean visual break. That gap is what tells the brain “one zone ends, another begins.”
| Zone | Suggested Rug Size | Sizing Rule |
|---|---|---|
| Lounge / conversation | 8×10 ft or 9×12 ft | Front legs of all seating on the rug |
| Dining | Table + 4 ft in each direction | Chairs stay fully on rug when pulled back |
| Reading nook | 5 ft round or 6×9 ft | Chair, side table, and floor lamp all inside |
2. Float the Sofa and Let Its Back Be the Divider
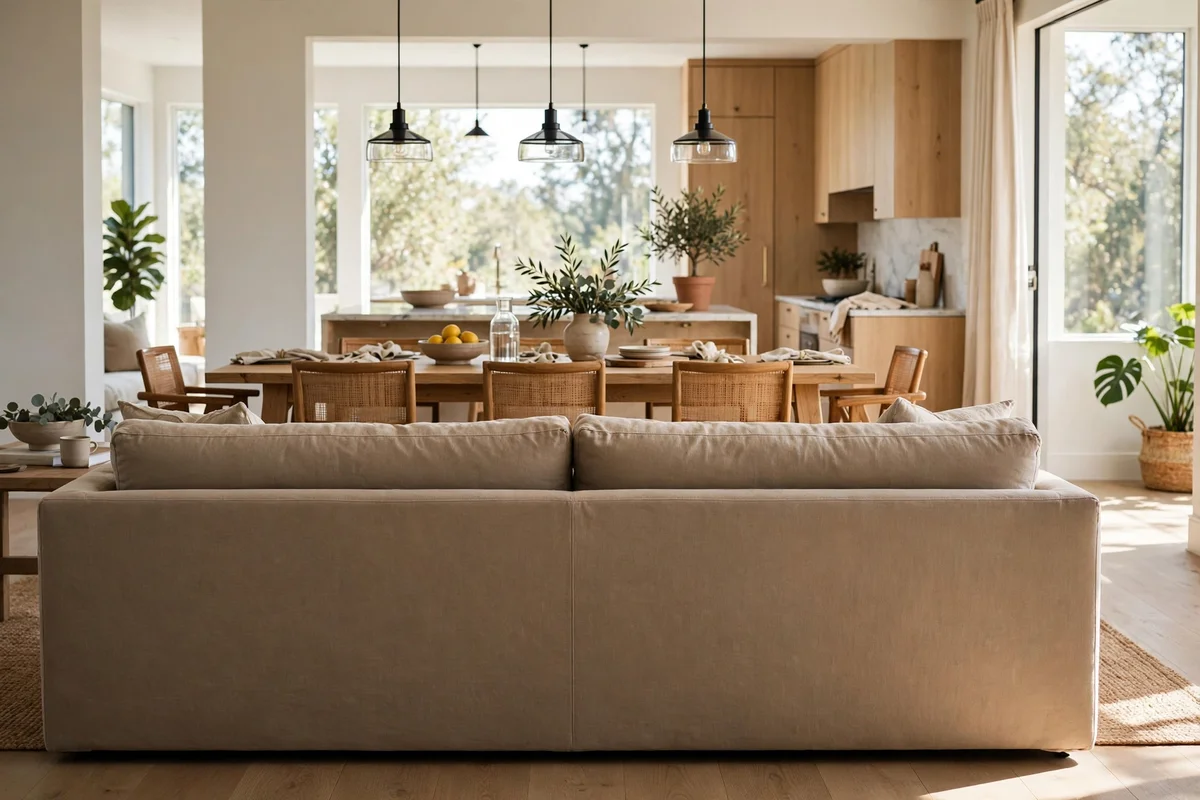
Pushing every piece of furniture against the perimeter walls is the fastest way to make an open plan feel hollow. Instead, pull the sofa forward into the room and turn its back toward the next zone. That single move creates a room-within-a-room: the lounge faces inward toward its own focal point, while the sofa’s back forms a soft, sightline-friendly boundary with the dining or kitchen area behind it.
Building the boundary
A floated sofa works best when it is backed by something intentional. A narrow console table behind it gives the eye a finished line to rest on, hides the exposed upholstery, and adds a surface for lamps or storage baskets. Angle two accent chairs inward across from the sofa to close the conversation circle and reinforce the zone’s perimeter. If the scale of your space feels tight, a loveseat or a compact two-seat sofa can play the same dividing role — for more seating guidance in smaller footprints, see our roundup of the best seating ideas for small living rooms.
What to avoid
Do not float furniture so far into the room that the main walking path cuts through the conversation. Plan the traffic route first — ideally around the seating group, never through it — then place the sofa with clear walkways on both sides of the zone.
3. Give Every Zone Its Own Lighting Layer
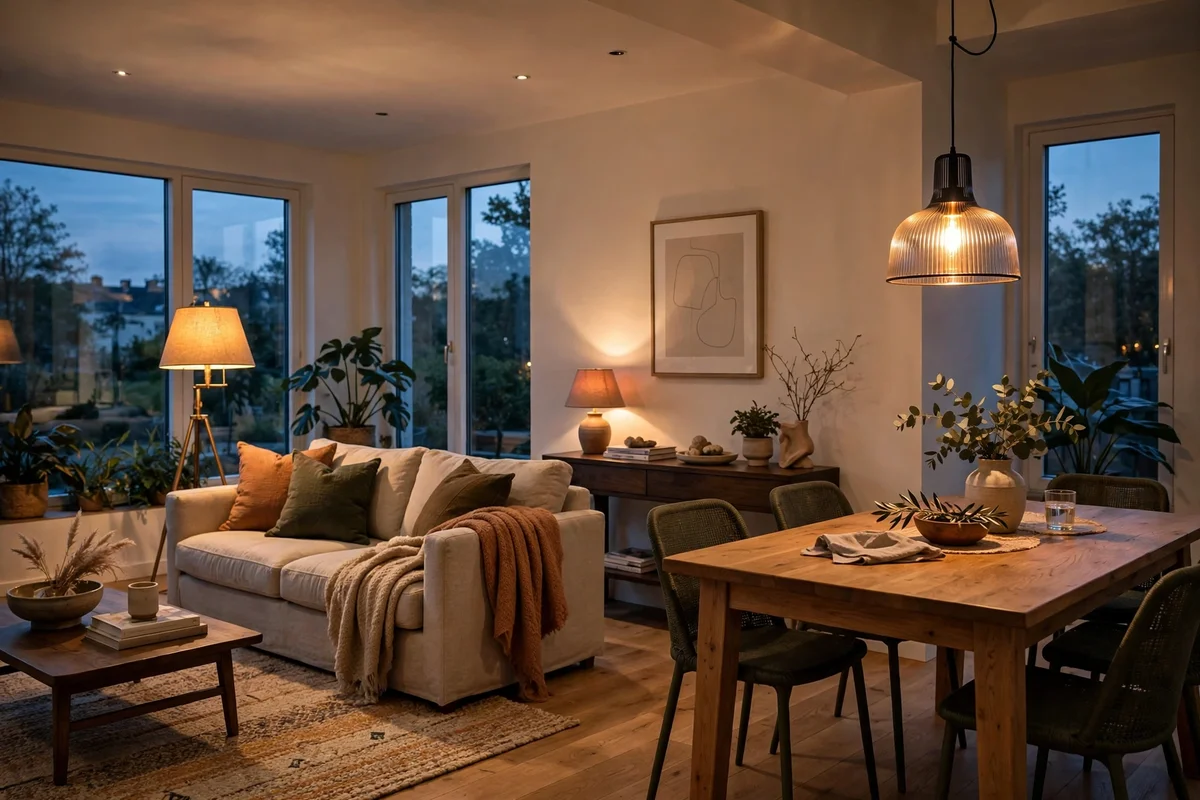
Light is invisible architecture. A pendant hung over the dining table, a floor lamp arc beside the reading chair, and a table lamp glowing on the lounge console each declare the purpose of the floor beneath them — no wall required. After dark, lighting does even more zoning work than furniture, because the eye follows pools of light before anything else.
A simple lighting formula per zone
- Lounge: one ambient source (floor lamp or dimmed overhead) plus one task light near the reading seat, all on dimmers.
- Dining: a single statement pendant or chandelier centered over the table, hung low enough to gather the table visually but high enough for clear sightlines.
- Work nook: a focused task lamp with a warmer bulb, signaling “office” rather than “living room.”
Keep the bulb color temperature consistent across zones — warm white everywhere, for instance — so the separate pools of light feel like one home rather than competing rooms.
Why dimmers matter
Open plans have to shift mood by activity and hour. Dimmers on each zone’s key fixture let you brighten the dining pendant for a dinner party while the lounge glows softly beside it. Independent switching is what turns one big room into several rooms that each behave correctly after dark.
4. Paint a Color Zone Without Painting the Whole Room

Color is a non-structural zoning superpower. Painting the wall behind the dining area a deeper shade, or wallpapering the lounge’s anchor wall, instantly gives that zone its own identity while the rest of the plan stays neutral. You keep the flow; the color does the dividing.
Three low-risk approaches
- The anchor wall. Choose the wall behind each zone’s focal point — the sofa wall, the dining wall — and give it a distinct but coordinated color. Even a half-shade deeper than the main wall color reads as intentional.
- The tonal gradient. Stay in one color family: a warm greige lounge, a slightly richer taupe dining area. The tonal shift separates zones without any hard line.
- The partial panel. Frame a wallpapered or painted panel with molding on a long blank wall, like a picture. It defines the zone behind it and is completely reversible, which renters will appreciate.
Keeping the palette cohesive
Whatever you do, repeat the zone’s accent color at least twice across the open plan — in a throw pillow, a piece of art, a chair cushion. The repetition is what keeps color zones from feeling like separate rooms that collided. A unified palette is one of the designer-approved features of a timeless living room, and it matters even more when you can see every zone at once. And if the palette needs a style language to hang on, our open plan living zone styles page works through ten named styles for zoned rooms.
5. Use Open Shelving as a See-Through Divider
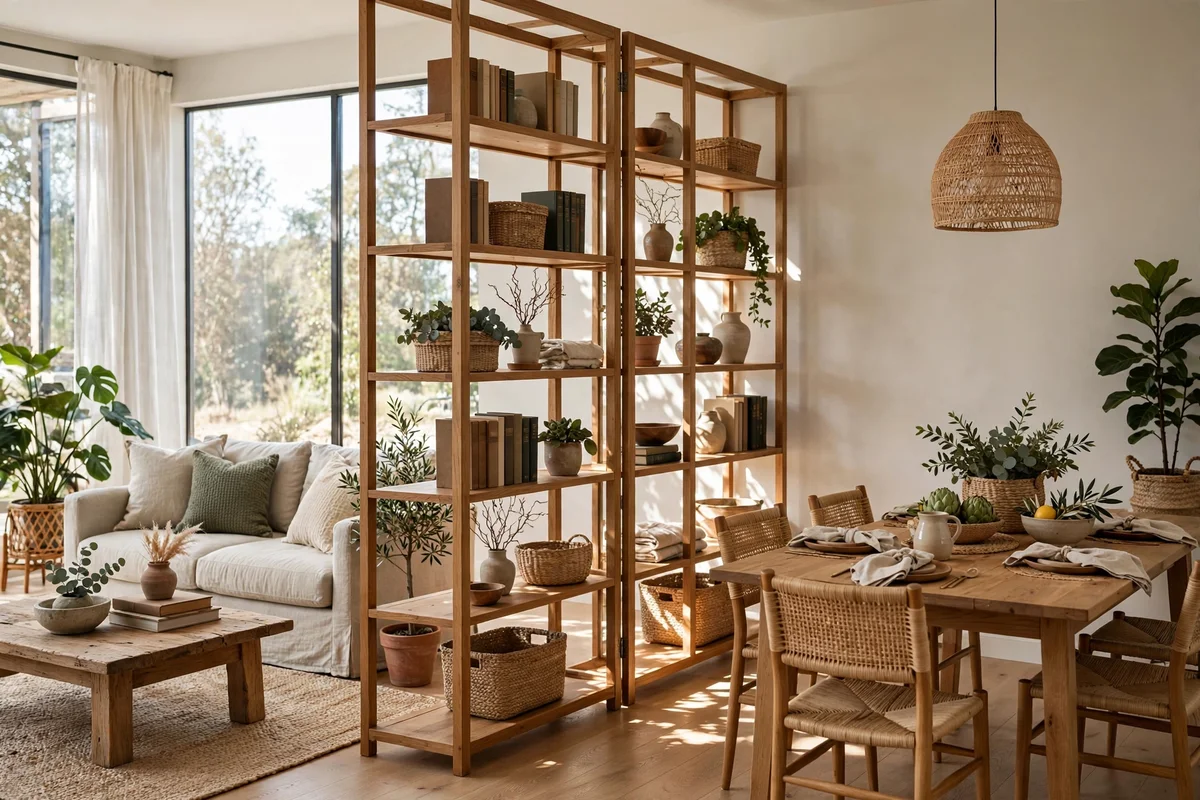
A double-sided open bookcase placed between the lounge and dining areas gives you separation, display space, and storage in a single piece — while light still passes through the gaps between shelves. It is the rare divider that makes the room feel more organized rather than more closed in.
Styling the divider
Leave roughly a third of the cubbies open so the unit never reads as a solid wall. Style the shelves from both sides: books and storage baskets on the dining side, art objects and a small plant on the lounge side. Keep the unit’s finish consistent with the rest of your furniture — matching wood undertones across the room is what keeps an open plan calm.
Placement tips
- Run the shelving perpendicular to the longest wall for the clearest zone division.
- Keep it low to mid-height (waist to shoulder) unless you specifically need to screen a view; tall units start to chop up sightlines.
- Leave at least a couple of feet of clearance at one end so traffic can flow around it — a divider that blocks the walking path fails at its main job.
6. Set a Console Table Behind the Sofa
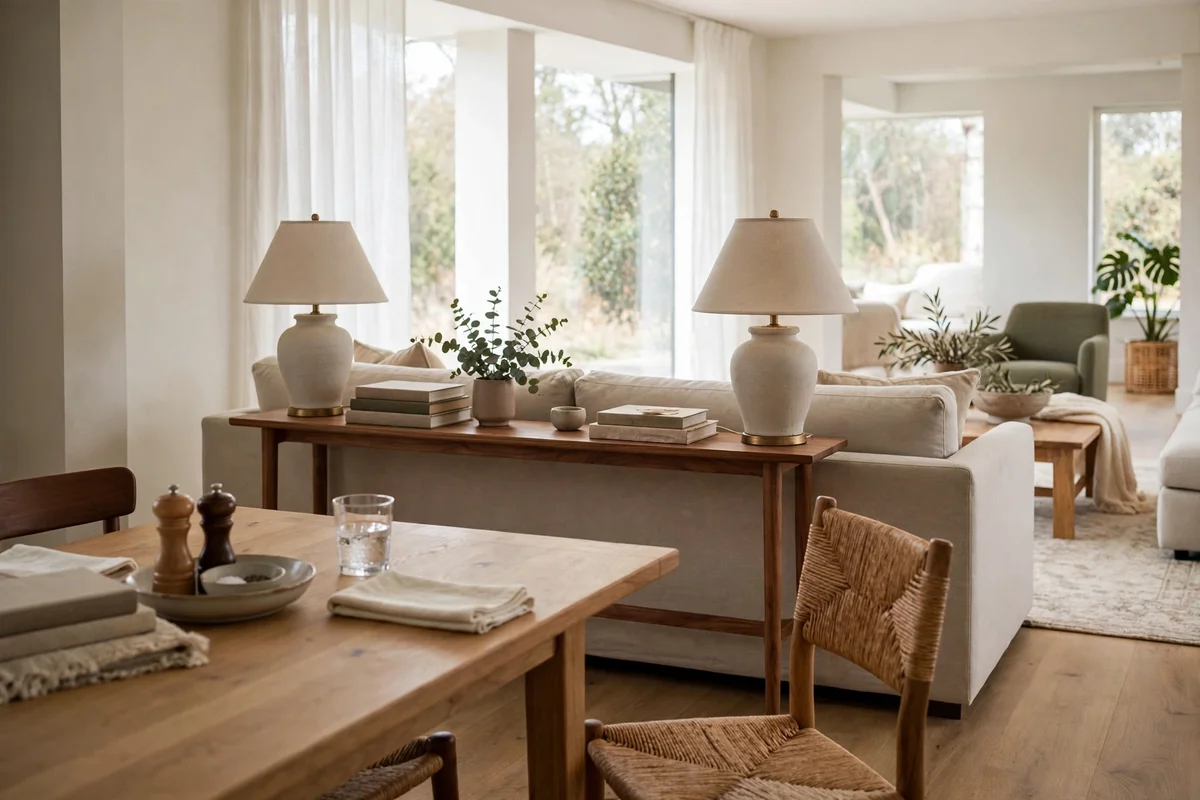
Small but mighty, the console table is one of the most practical dividers in open-plan living. Slid behind a floated sofa, it creates a visual “stop” that signals where the lounge ends and the next zone begins — without blocking light or movement the way a tall bookcase might.
Making it work harder than a boundary
A console is also some of the most useful surface area in the house: a pair of table lamps turns it into a lighting layer, a row of baskets underneath becomes concealed storage, and a few styled objects give the back of the sofa a finished look from the dining side. Choose a console one to two inches lower than the sofa back so it reads as an extension of the seating rather than a separate piece of furniture.
7. Hang Curtains or Fabric Screens as Flexible Walls
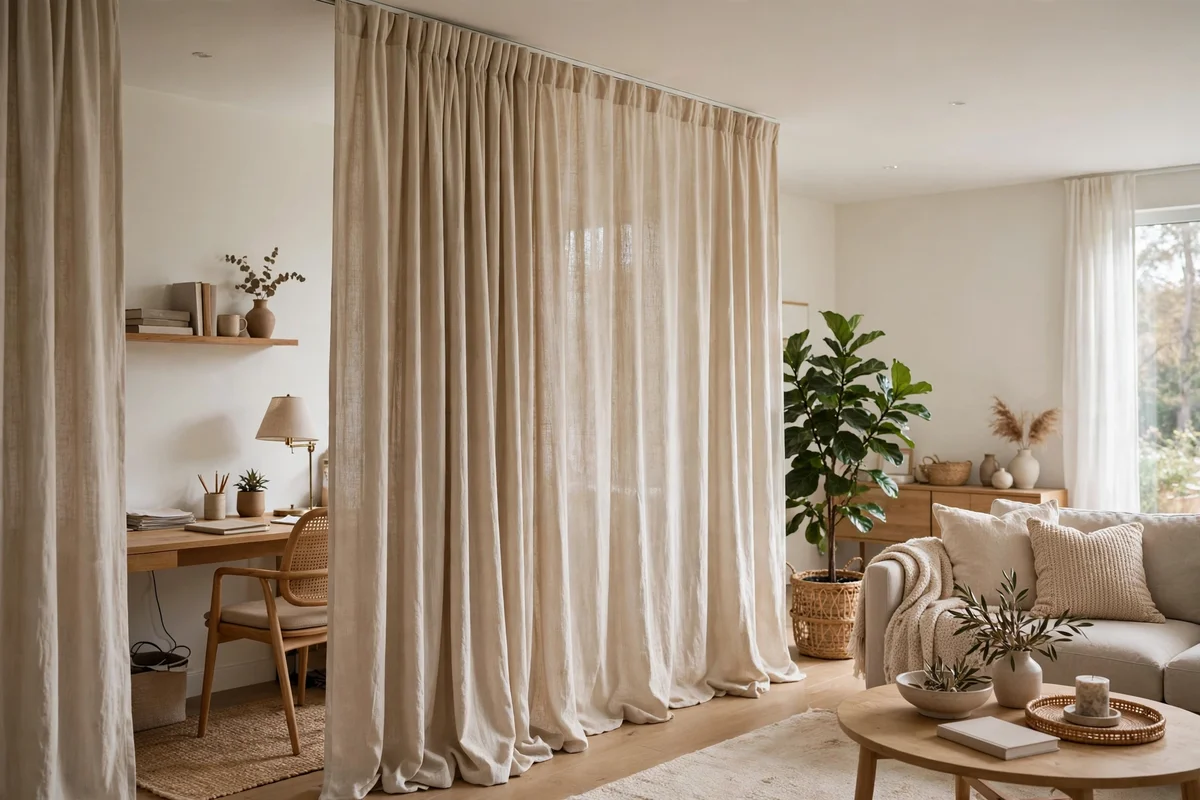
When you need a boundary that can disappear on command, nothing beats fabric. A ceiling-mounted curtain track or a pair of tall linen panels can close off a home office nook, soften the sightline into the kitchen, or give a sleeping loft real privacy — then pull back completely when you want the full openness back.
Why fabric works
Curtains add something hard dividers cannot: softness and sound absorption. Pleated linen or cotton panels dampen the echo that makes big open rooms feel cold, and they add vertical texture that bare drywall lacks. They are also renter-friendly — a tension track or freestanding screen leaves no permanent marks. This flexibility is exactly why fabric zoning is a staple of studio living; see our guide on how to decorate a studio apartment for more small-footprint zoning tactics that translate directly to open-plan lounges.
Choosing the right fabric
- Sheer or linen: defines the zone while keeping light flow; best for office nooks and reading corners.
- Heavyweight cotton or velvet: gives real visual privacy and the most sound softening; best between sleeping areas and social zones.
- Ceiling track vs. freestanding screen: tracks look built-in and glide smoothly, while folding screens need no installation and can be repositioned in seconds.
8. Divide With Tall Plants and Planter Groupings

Greenery is the friendliest divider there is: it separates zones, cleans the sightline, and makes the whole plan feel alive — all without a single straight edge. A tall fiddle-leaf fig, an olive tree, or a row of planters at the corner of the seating rug can quietly say “the lounge ends here.”
Building a plant boundary
- Single statement plant: one 5-to-6-foot tree in a large pot marks a zone corner beautifully and needs the least floor space.
- Planter row: two or three medium plants in a long, low trough create a living line between zones — perfect along the back of a dining table.
- Tiered cluster: group plants of different heights on the floor to fill a wide gap without one giant pot.
Vary heights and leaf shapes so the grouping reads as intentional rather than a plant graveyard, and keep all pots in the same material family to match the room’s finishes.
A practical note
Plants are dividers with a maintenance schedule. Place them where their light needs are met — most large houseplants want bright, indirect light, which open plans usually have in abundance — and be honest about your watering habits. A dead divider plant zones nothing; a thriving one is the hardest-working piece of furniture in the room.
9. Use the Ceiling to Say “This Is a Room”
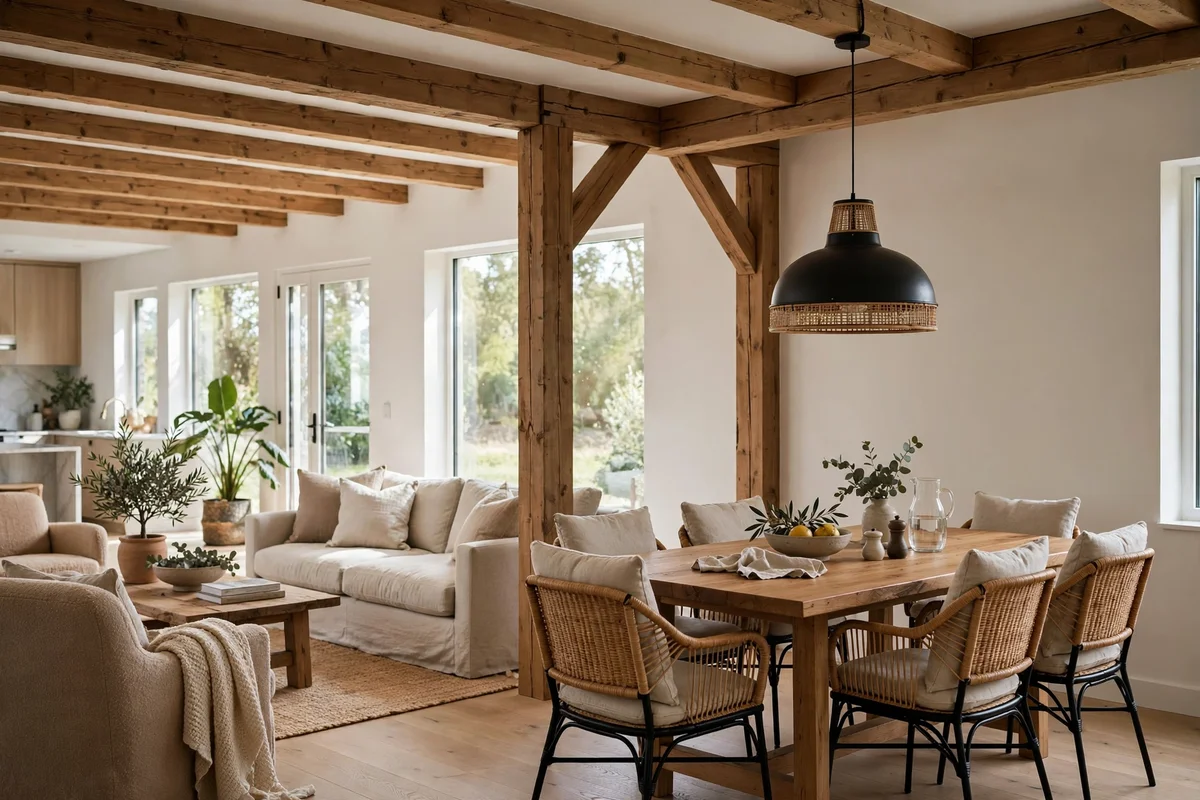
Walls are not the only architectural element that defines a room. The ceiling above each zone can do the same job: a beam over the dining area, a pendant cluster over the lounge, or a painted ceiling inset over the reading nook all tell the eye where one zone ends and another begins — while the floor stays completely open.
Ceiling zoning moves
- Exposed or faux beams running across one zone give it a distinct architectural identity; they work especially well over dining areas.
- A pendant cluster or oversized pendant hung low over a zone acts like a ceiling-level spotlight, gathering everything beneath it.
- A ceiling color block — painting the ceiling above one zone a shade deeper than the rest — is a bold, low-cost move that reads as architecture.
- A change in ceiling height, where the structure allows, creates the most permanent-feeling division of all without a single wall.
For a deeper look at how designers layer light and ceiling detail to define open spaces, the step-by-step guide at Nordic Design Blog covers walkway clearances and fixture placement worth bookmarking.
10. Add a Half-Height Partition or Slatted Wood Screen
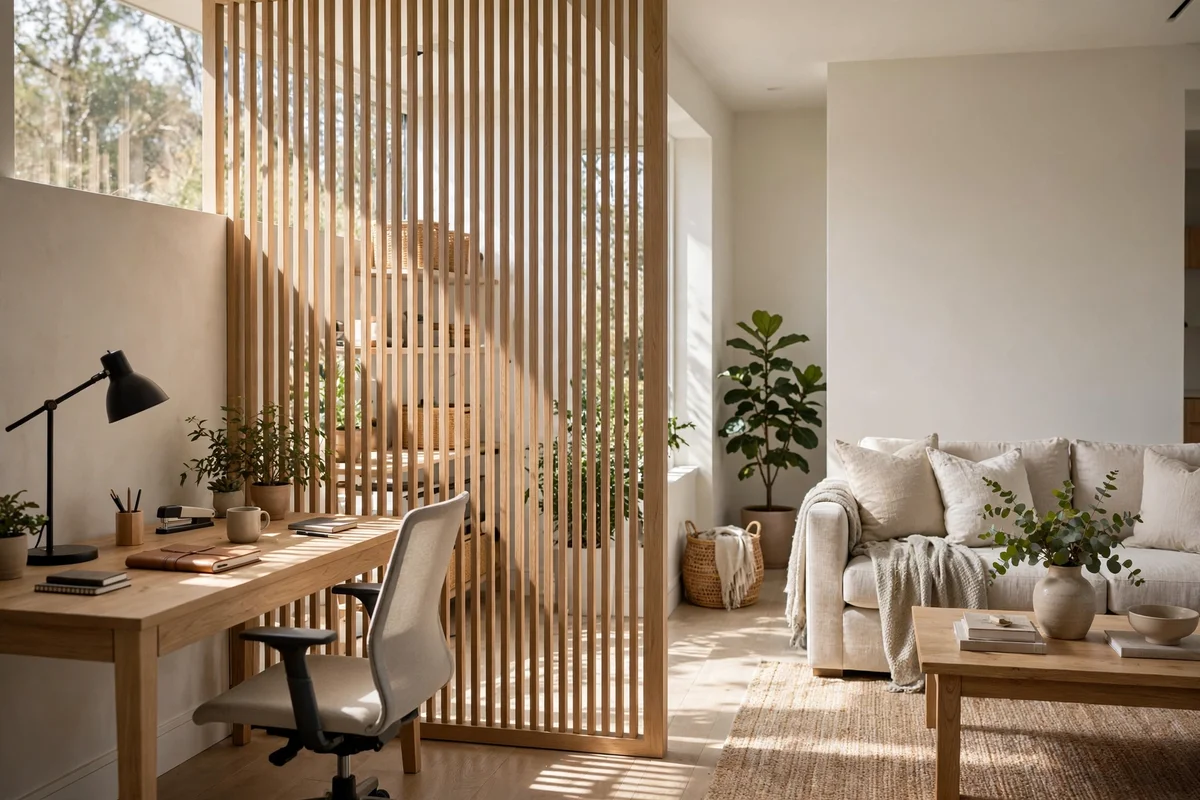
When a soft boundary is not enough — the kitchen prep area needs screening, or the desk needs a real sense of enclosure — a half-height partition or slatted wood screen splits the difference. It blocks the sightline where it matters while light and air still move freely over and through it.
Choosing your partition style
- Slatted wood screen: vertical slats spaced a finger’s width apart give privacy at eye level while the gaps keep the space bright. It doubles as a design feature and works in modern, Scandinavian, and Japandi rooms.
- Half-height partition: a waist-to-shoulder wall section, often with storage or a display ledge on top, creates a permanent-feeling boundary for the desk or TV zone.
- Glass partition: for maximum light, a framed glass panel with a sliding door gives genuine separation — and genuine quiet — with almost no visual bulk.
Unlike full walls, all three keep the long sightlines that make an open plan feel generous. For more layout thinking on protecting sightlines and traffic flow, Decoralot’s open-concept layouts guide shows how furniture-backed zoning keeps movement natural.
Where partitions earn their keep
Use them where function genuinely demands it: between a work desk and the TV, beside a kitchen island to hide prep mess from guests, or along the edge of a sleeping nook in a studio-style plan. Everywhere else, stick with the lighter tools above — the goal is zones you can feel, not walls you rebuilt.
Frequently Asked Questions About Open-Plan Living Zones
What is a living zone in an open-plan home?
A living zone is a clearly defined functional area — lounging, dining, working, sleeping — inside a larger open footprint. It is created with rugs, furniture arrangement, lighting, color, or light dividers rather than walls, so each activity gets its own sense of place while the space stays visually connected.
How many zones should an open-plan living space have?
Most open plans work best with two to three primary zones, such as a lounge, a dining area, and a compact work or reading nook. Trying to squeeze in five or six distinct areas usually creates visual clutter instead of clarity. Base your zone count on how your household actually lives, not on an aspirational floor plan.
Can you zone an open-plan room without buying new furniture?
Yes. Start by floating your existing sofa away from the wall and angling chairs into a conversation grouping. Rearranging what you own costs nothing and often creates a recognizable lounge zone instantly. Add one large rug and reposition a floor lamp, and you have two defined zones for almost no spend.
What is the best rug layout for zoning an open plan?
Give each zone its own rug, sized so furniture sits properly on it — front legs of seating on the lounge rug, chairs fully on the dining rug. Leave a strip of bare floor between rugs as a visual break, and coordinate the rugs by undertone rather than matching them exactly so the zones feel connected but distinct.
How do I zone a small open-plan living room?
Keep every divider low and light: rugs, a floated sofa, layered lamps, and low shelving. Avoid tall bookcases or heavy screens that chop up sightlines in tight spaces. Choose slim-profile furniture, keep walkways clear, and let one cohesive color palette carry the unity so the small space feels organized rather than cramped.
How do I keep an open-plan space from echoing?
Layer soft, sound-absorbing materials across zones: thick rugs with felt pads, upholstered seating, pleated curtains, and bookshelves. Hard parallel surfaces — bare floors, high ceilings — bounce sound around, so breaking them up with textiles in each zone noticeably softens conversation and TV noise.
What lighting works best for open-plan zones?
Give each zone its own switched lighting: a pendant over the dining table, floor and table lamps in the lounge, and a task lamp at the desk. Keep bulb color temperature consistent across zones and put key fixtures on dimmers so you can shift each area’s mood independently after dark.
How do I separate a home office from the living area in an open plan?
Use a combination of a small rug under the desk, a dedicated task lamp, and a light divider — an open shelf, a tall plant, or a curtain on a ceiling track. Position the desk so video calls face a styled backdrop rather than the TV, and add a lidded basket to hide work gear when the office “closes” for the evening.
Do open-plan zones hurt resale value?
No — thoughtful zoning typically helps, because buyers see a space with clear purpose rather than an undefined cavern. The advantage of rug, furniture, and lighting zoning is that it is completely reversible, so buyers can imagine their own arrangement. Even light partitions like slatted screens can be removed easily.
Should each zone have its own color scheme?
Each zone can have its own accent color, but the overall palette should stay unified. Pick one neutral base and repeat each accent color in at least two zones so the eye reads one cohesive home. Clashing palettes between zones is one of the fastest ways to make an open plan feel chaotic instead of calm.
Conclusion
Open-plan living works best when it feels like several thoughtful rooms that happen to share one open footprint — not like one giant room where everything bleeds together. The ten ideas above give you a full toolkit: start with the free and easy moves, like floating the sofa and pulling chairs into a conversation group, then layer in rugs, lighting, and color to give each zone its own identity. If you need more definition, reach for open shelving, consoles, curtains, plants, ceiling treatments, or a slatted screen — always choosing the lightest divider that does the job. Each of those first moves is worked as a finished example in our open plan living zone examples tips.
The through-line in every successful open plan is cohesion. Repeat your wood tones, metals, and accent colors across zones, keep walkways clear, and protect the long sightlines that made you love the open layout in the first place. Do that, and your zones will feel like rooms with purpose — defined without a single wall, and flexible enough to rearrange whenever your life changes.


Pingback: Open Plan Living Room Zones: 5 Steps + 10 Styles That Work