
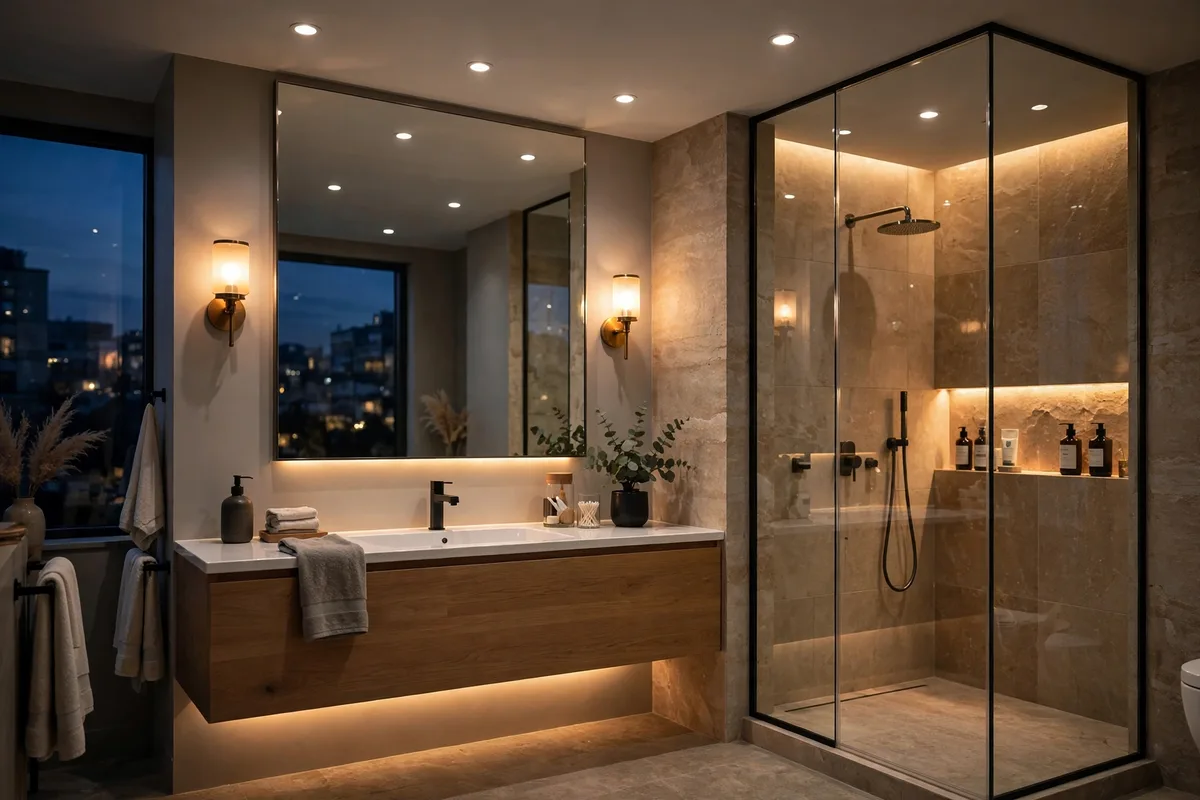
Most bathrooms have exactly one light doing three jobs badly: a ceiling fixture or vanity bar that must fill the room, light a face and set a mood — and manages a flat, shadowy compromise at all three. Layered lighting is the fix designers actually use: split the jobs. An ambient layer fills the room, a task layer lights the face, a shower layer handles the wet zone, accent and night layers handle everything the bright layers ruin. Each layer is modest on its own; together they make the same bathroom feel twice as expensive and work at every hour.
Ten layer ideas, in the order you would plan them — ceiling first, face second, water third, glow last.
In this guide: The Lighting Layers at a Glance · 1. Think in Layers, Not Fixtures · 2. Ambient: The Ceiling Base Layer · 3. Task at the Mirror: Sconces Flank, Shadows Leave · 4. When a Bar Must Do It: The Overhead Layer, Corrected · 5. The Wet Layer: Light Inside the Shower and Over the Tub · 6. Accent: The Glow Layer — Niches, Toe-Kicks, Under-Vanity Strips · 7. The Night Layer: Bright Enough to Walk, Dim Enough to Sleep Through · 8. One Colour Temperature, Honest Colour: Kelvin and CRI Discipline · 9. Dimmers and Separate Switches: Layers You Can Actually Use · 10. No-Rewire Layers: Renters and Small Bathrooms · Frequently Asked Questions About Bathroom Lighting Layers · Conclusion
The Lighting Layers at a Glance
| Layer | Its job | Typical fixtures |
|---|---|---|
| Ambient | Fill the room evenly | Recessed lights, flush mount |
| Task (vanity) | Shadow-free face light | Sconces at 60–66 in, flanking the mirror |
| Wet zone | Safe light in shower/tub | IP-rated recessed, sealed fixtures |
| Accent | Depth and glow | Under-vanity strips, niche lights |
| Night | 3 a.m. navigation | Toe-kick LEDs, low nightlight |
| Control | Each layer separately | Dimmers + separate switches |
1. Think in Layers, Not Fixtures
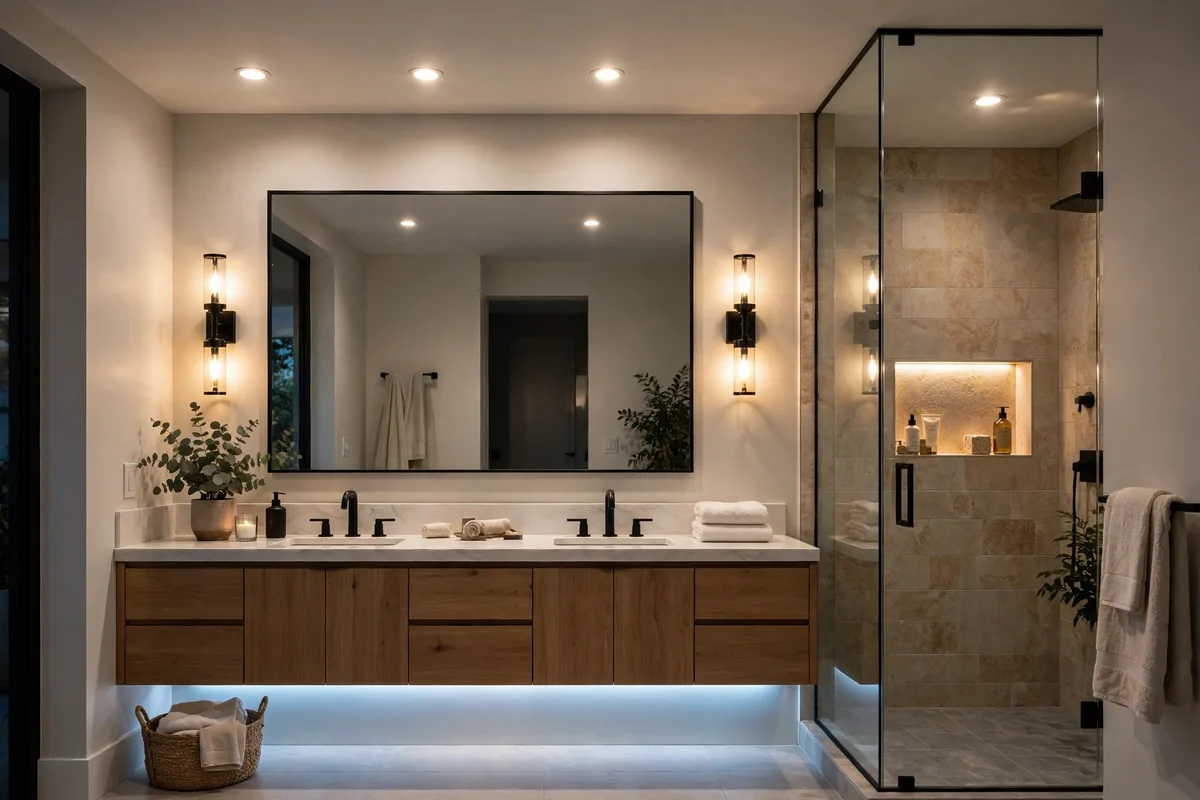
The framework is borrowed from living-room design and it is now the standard bathroom approach: divide light into ambient (the room’s general fill), task (focused light where work happens) and accent (light for depth and mood). Loving Bullet’s bathroom lighting guide makes the case against the old default: the single vanity bar tried to do every job from the worst possible position — above the face it was lighting. Layers are simply jobs, assigned to fixtures placed where each job is done.
Plan on paper first: list the layers, give each a fixture, a switch and a brightness role. The plan is forgiving about budget — a layer can be one recessed light or one strip — but unforgiving about omission: a missing layer is exactly the corner of the bathroom that will always feel wrong.
The same layering logic, tuned for sleep instead of grooming, runs our bedroom lighting guide — faces and water here, rest there.
2. Ambient: The Ceiling Base Layer
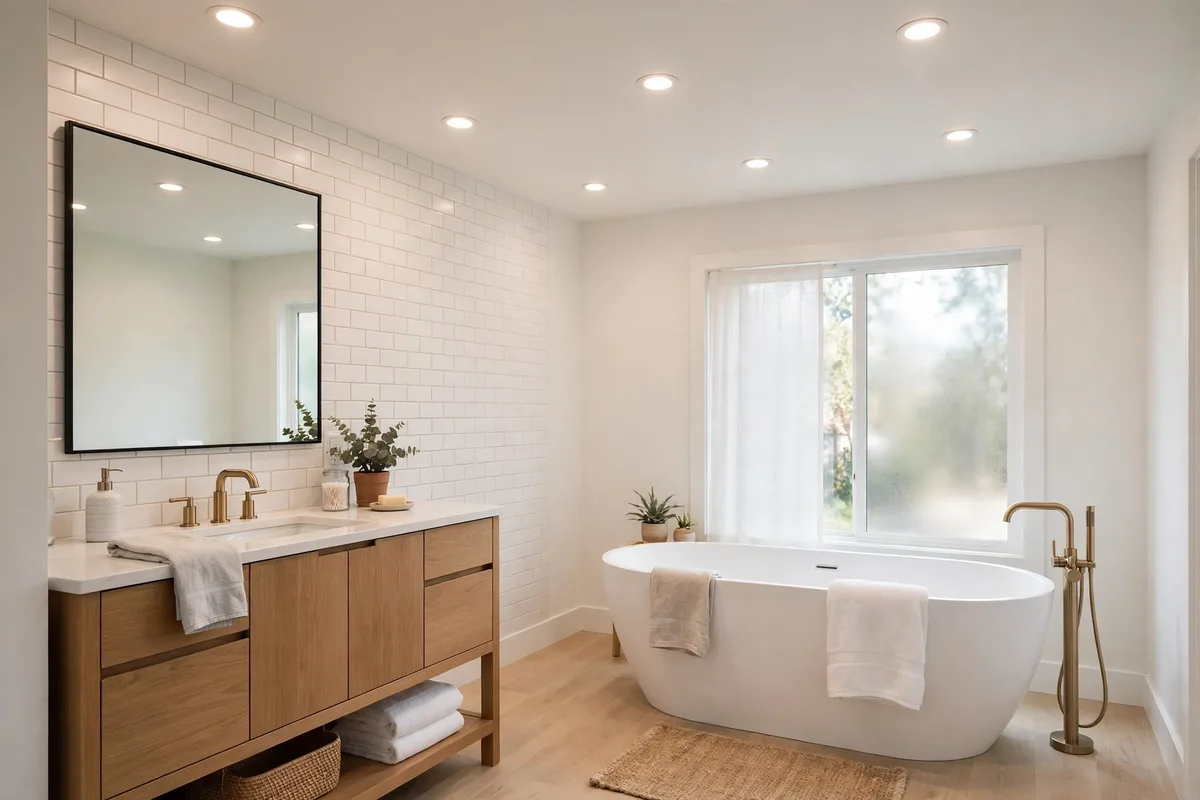
Ambient light is the floor everything stands on: even, shadow-soft illumination that lets you navigate, clean and judge the room. Recessed downlights spread on a grid, or one good flush-mount in a small room, do the job; in larger bathrooms a damp-rated decorative fixture can carry it with more personality. Size the whole plan by output: lighting guides such as 2Modern’s colour temperature and lumens guide put bathrooms at roughly 70–80 lumens per square foot across all layers combined — the ambient layer typically supplies the base share, with task and accent topping it up where it matters.
The ambient mistake is asking it to be interesting. Its job is invisibility: no hot spots, no dark corners, no single bulb the eye keeps visiting. Interest is the accent layer’s job (§6); the ceiling’s job is to make every other layer look easy.
3. Task at the Mirror: Sconces Flank, Shadows Leave
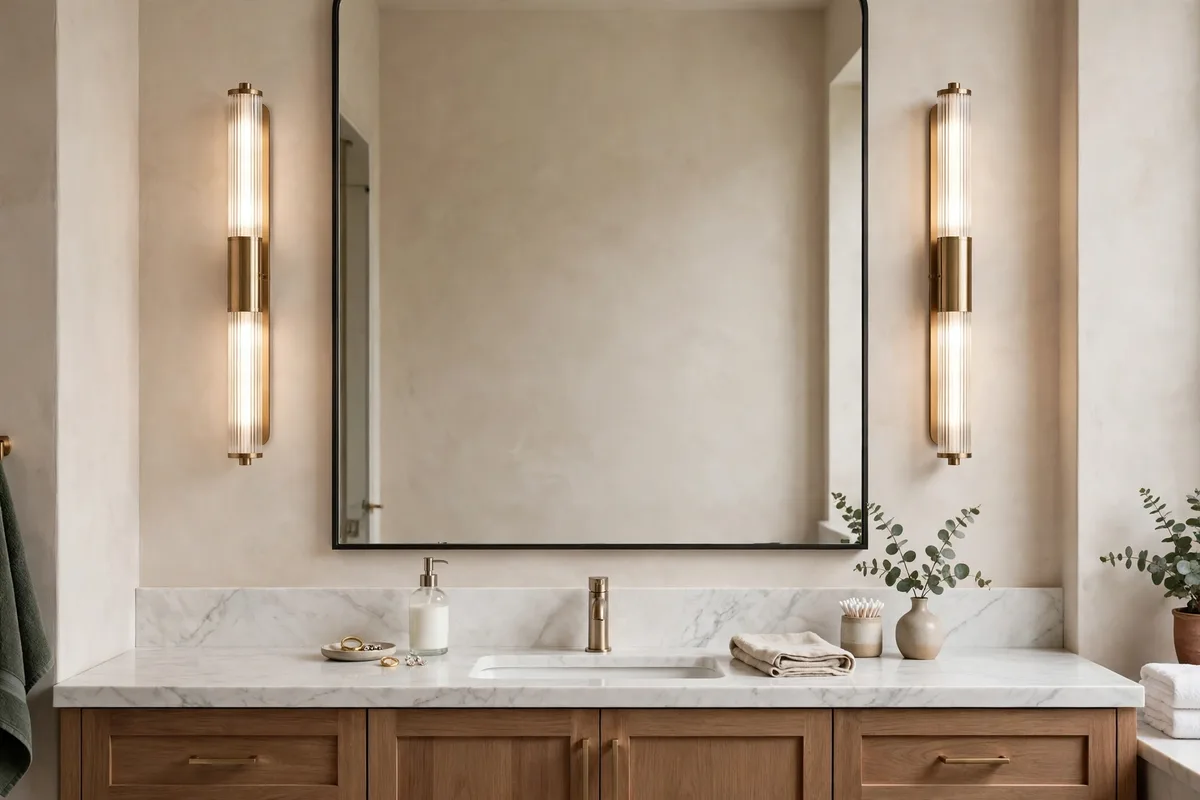
The task layer is the one the bathroom exists for, and its geometry is settled: light the face from both sides, at face height. Sconces flanking the mirror at roughly 60–66 inches from the floor cross-illuminate the face so neither side shadows the other — the setup Loving Bullet credits with replacing the overhead bar, and the flanking arrangement our bathroom mirror placement ideas builds its width margins around. Aim for roughly 1,500–2,500 lumens total at a single vanity (more across a double), from frosted or shaded fixtures that never show a bare bulb to the eye.
Overhead-only task light is the failure this layer exists to fix: it carves eye sockets into shadow and ages every face a decade. If your bathroom has it, the single highest-value change in this article is moving the task light to the sides of the mirror.
The horizontal half of the geometry matters as much: space a pair of sconces roughly 36–40 inches apart, centre to centre, with each fixture a few inches clear of the mirror’s edge — the widely used spacing that puts light on both sides of the face evenly. On a wide double vanity, centre each sconce on its own basin rather than on the mirror’s halves.
4. When a Bar Must Do It: The Overhead Layer, Corrected
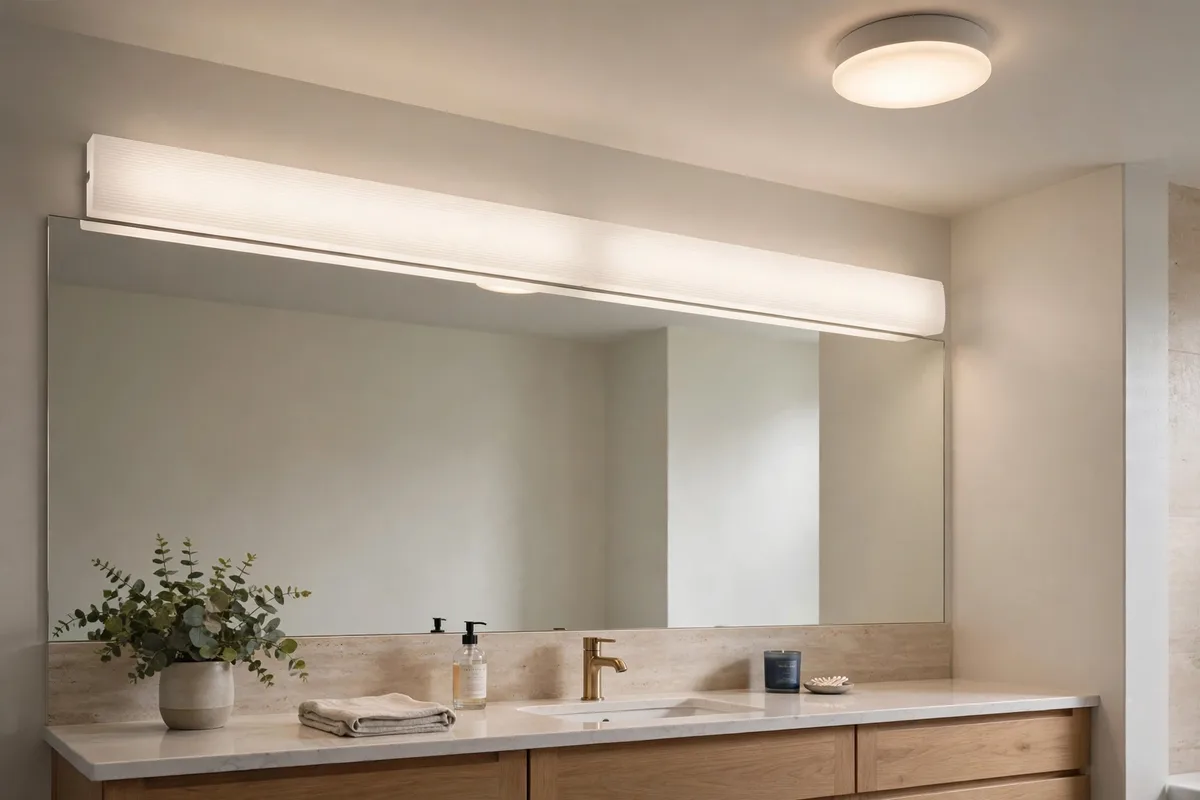
Some mirrors have no flanking wall — a mirror wall-to-wall, a corner vanity, a rental you cannot rewire. Then the overhead bar stays, but it gets corrected: choose a wide, frosted fixture that spreads light rather than beaming it down, mount it high enough to wash the face rather than spotlight the forehead, and — the real fix — stop asking it to work alone. A ceiling ambient light (§2) close to the vanity fills the shadows the bar creates, and the two together approximate what sconces do natively.
For double vanities the bar scales badly: one long bar lights the counter’s middle best and its ends worst. Two shorter bars, one centred over each basin, restore the per-user symmetry — the same centre-on-the-basin rule that governs the mirrors themselves.
As proportions, the widely used guideline is a bar centred roughly 75–80 inches from the floor and around three-quarters of the mirror’s width — high enough to wash the face, wide enough not to spotlight its centre.
When there is no wall to flank: the lighted mirror. A wall-to-wall mirror leaves no room for sconces at all, and the honest answer is a front-lit mirror: light built around or behind the glass, throwing forward onto the face instead of down from above. Judge it by the same discipline as sconces — colour temperature matched to the room’s other layers (Section 8) and high CRI at the glass — and it stops being a compromise and becomes the neatest task layer of the set.
5. The Wet Layer: Light Inside the Shower and Over the Tub
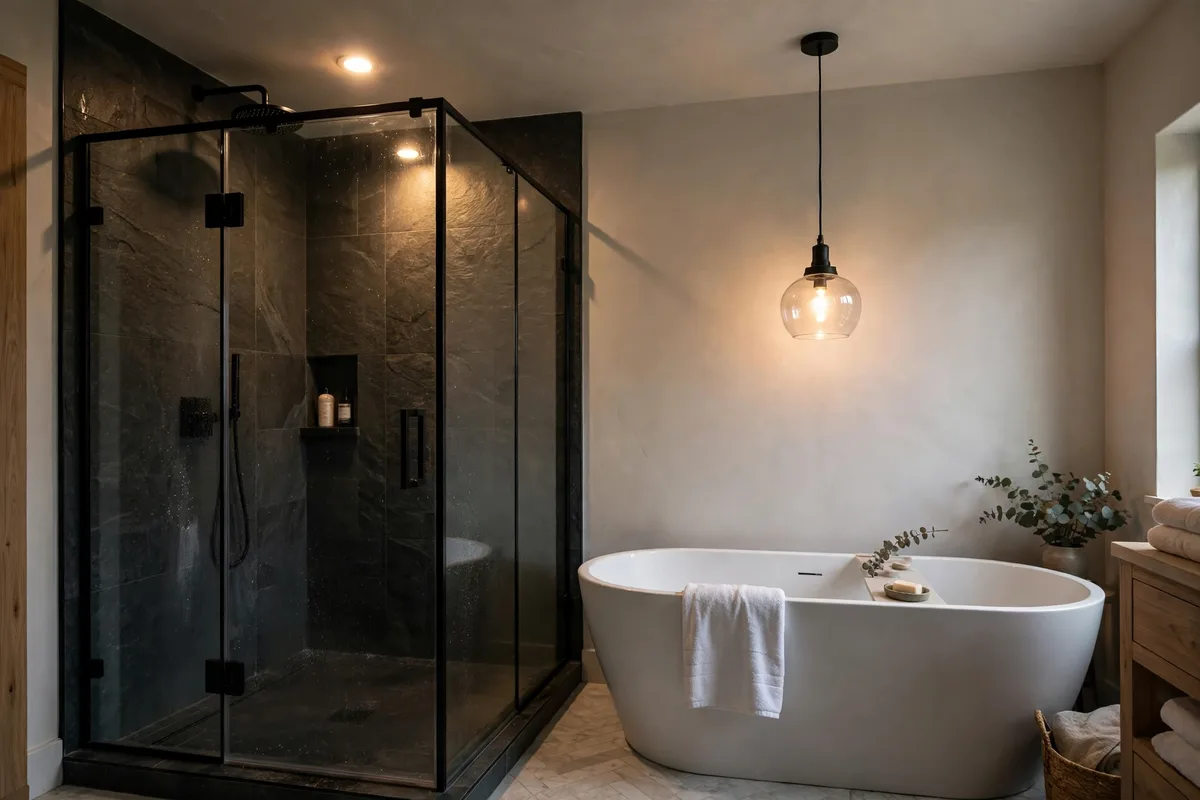
Showers are caves in most bathrooms: the curtain or glass blocks the room’s light and the bather showers in their own shadow. The wet layer fixes it with one sealed, wet-location-rated recessed light inside the shower — Loving Bullet lists it among the highest-value upgrades, for safety as much as comfort — and a damp-rated fixture over a freestanding tub, positioned to code (hanging fixtures keep their required clearance above the tub rim). Ratings are the non-negotiable: wet-rated inside the spray, damp-rated in the room’s steam zone, always.
This layer also serves the tile: light raking down a shower wall shows off texture and makes grout lines honestly visible for cleaning — one more reason the pairings in our shower tile combinations ideas assume a lit shower, not a dim one.
The zones, named: Bathroom safety guidance divides the room into zones by distance from water. Zone 0 is inside the bath or shower tray itself; Zone 1 is the area directly above the bath or shower; Zone 2 is the band around them. The ratings that follow from the zones, as widely used guidance states them: fixtures in Zone 0 need the highest protection (IP67), and Zones 1 and 2 call for IP44 or above. In US practice the same idea runs on listings instead of zone numbers — fixtures listed for wet locations inside the spray, damp locations in the steam around it. Either way, the rating is not a detail: it is the specification.
Wet-zone fittings and any new bathroom circuit belong to a qualified electrician, and ground-fault protection is the standard safeguard for bathroom circuits — Electrical Safety First sets out the household guidance.
6. Accent: The Glow Layer — Niches, Toe-Kicks, Under-Vanity Strips
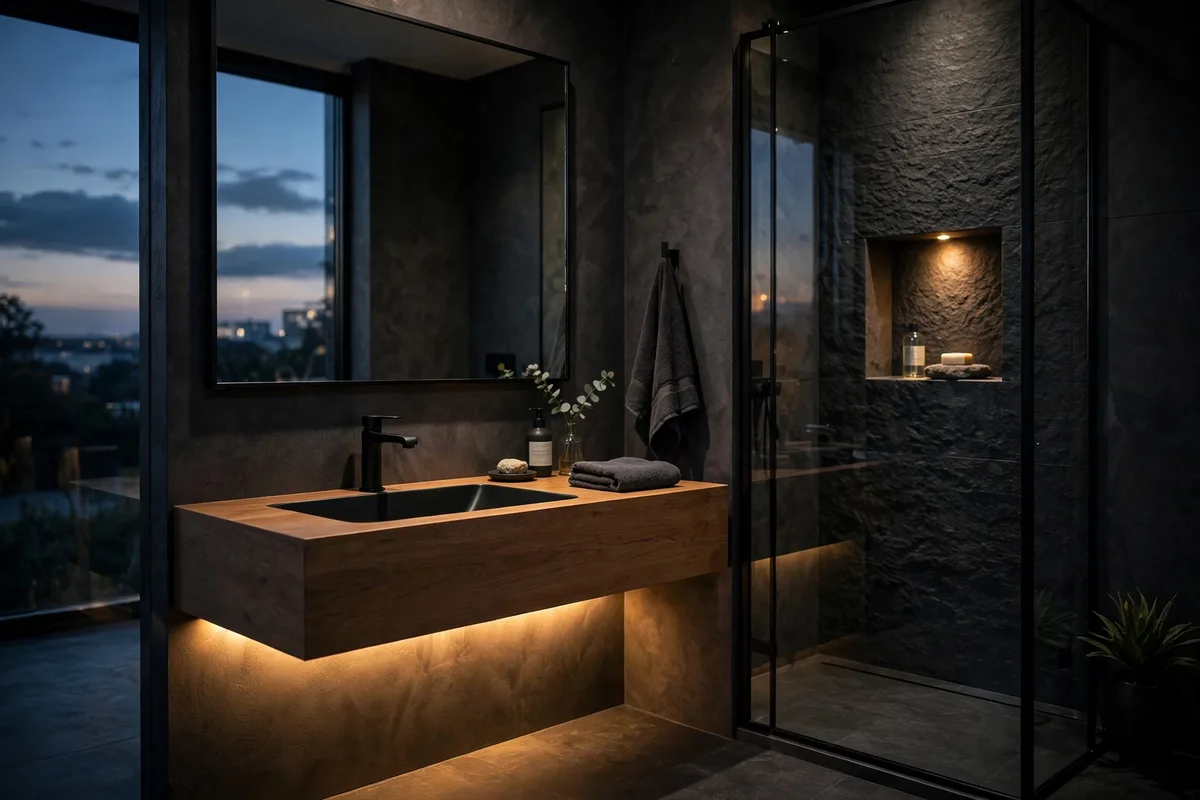
Accent is the layer guests remember and cannot name: a warm strip washing the floor beneath a floating vanity, a small light inside the shower niche, a glow behind a mirror. None of it is for seeing by; all of it is for depth — it separates surfaces, floats heavy objects and gives the room a horizon line at ankle height. LED strips make it cheap and cool-running; keep the colour temperature matched to the room (§8) or the glow reads as a different room leaking in.
Accent is also where small bathrooms gain most: under-vanity light visually lifts the cabinet mass, which is the same floor-revealing trick the mirror placement plays in our small bathroom visual space ideas. Light at the floor makes the floor — and therefore the room — read bigger.
7. The Night Layer: Bright Enough to Walk, Dim Enough to Sleep Through

Every layer so far is for waking hours. The night layer is a separate, humble circuit: a toe-kick strip under the vanity, a low plug-in nightlight, or a dimmed accent strip on its own switch or motion sensor — just enough warm light to navigate by without waking the household or destroying night vision. It is the lighting half of the guest night-layer in our guest bathroom accents ideas, and it belongs in family bathrooms just as much.
Specification: warm (2700K), low, and low-mounted — light near the floor guides feet without hitting eyes. On a motion sensor it asks nothing of a half-asleep user; on a separate switch it must be findable in the dark, which is an argument for the sensor.
8. One Colour Temperature, Honest Colour: Kelvin and CRI Discipline
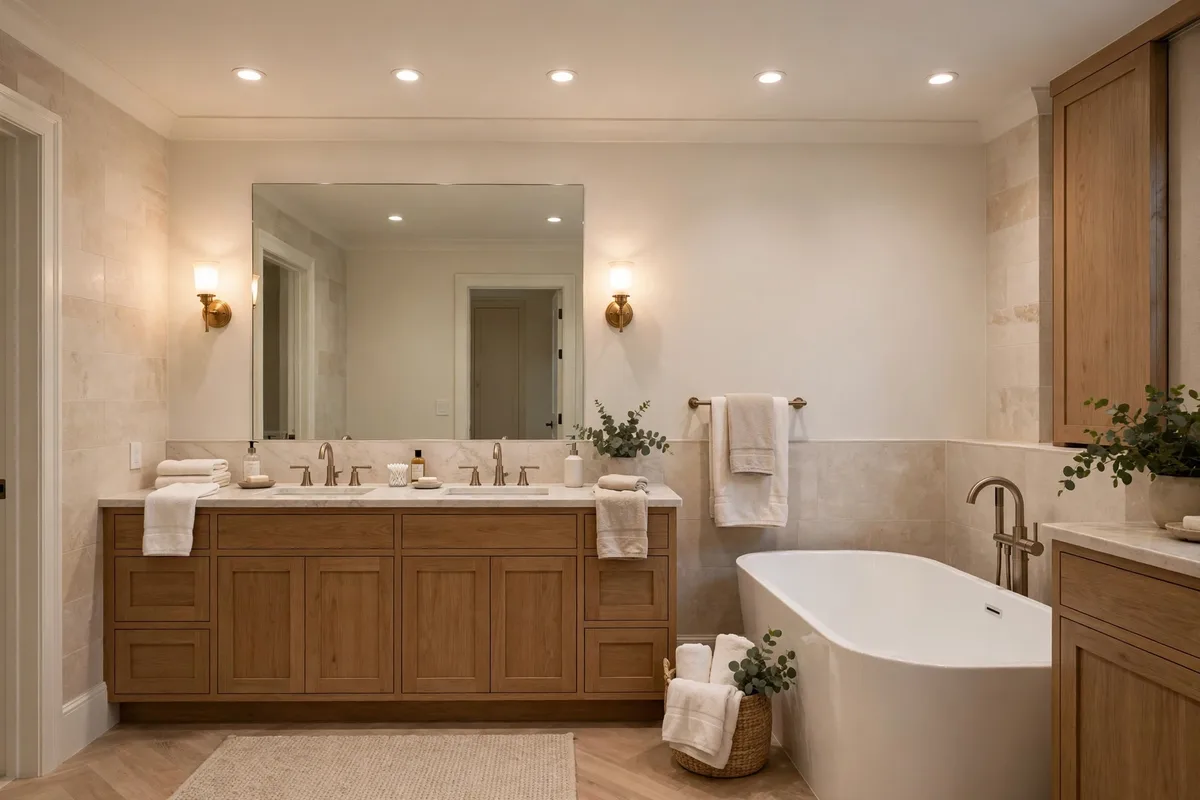
Layers only read as one room if they speak the same colour. The working ranges, per 2Modern’s guide: bathrooms sit around 3000–4000K overall — warm-neutral, daylight-honest — with the spa direction (§2 of our spa-style bathroom palette ideas) pulling ambient toward 2700–3000K and the vanity task light holding the neutral end for accurate makeup and shaving. What breaks rooms is mixture by accident: a 2700K ceiling, a 5000K vanity bulb and a cool-white strip glowing three different bathrooms at once.
Add CRI to the vanity spec: a colour-rendering index of 90+ at the mirror means skin tones and makeup read true — cheap insurance bought once, at bulb-choosing time. Buy every bulb and fixture for the room in one order, from one specification sheet, and the layers will match for years.
9. Dimmers and Separate Switches: Layers You Can Actually Use
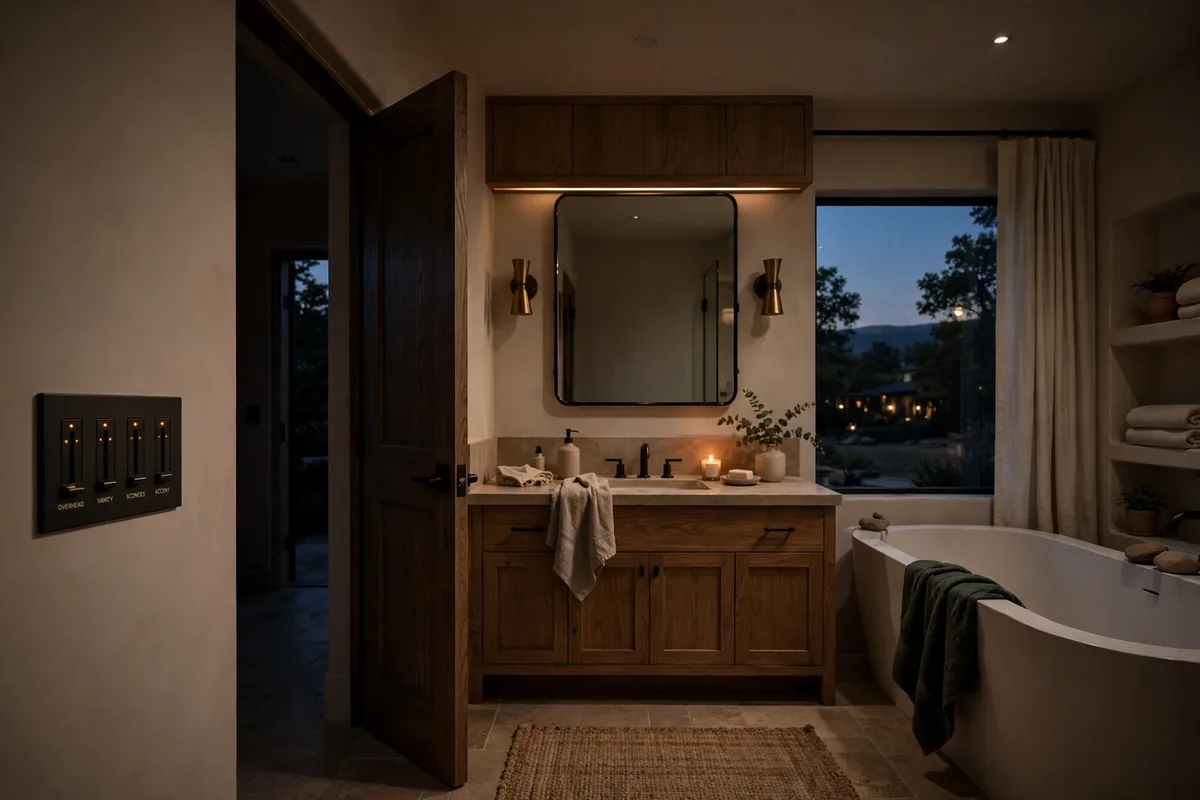
A layer you cannot switch separately is not a layer; it is a fixture. Wire (or smart-bulb) each layer to its own control: ambient on one dimmer, vanity task on another, accent and night on a third. Then the room has scenes instead of settings — full bright for cleaning, task-only for grooming, accent-plus-night for the evening bath — each one dimmable, because bathroom light needs change by the hour more than any other room’s.
Dimmers are also the cheapest layer of all: swapping a switch costs less than any fixture in this article and multiplies the value of every fixture already installed. If budget forces a sequence, controls come before accent fixtures — a dimmed two-layer bathroom beats a fixed four-layer one at 9 p.m.
One Whole Room, Worked: A Small Hall Bathroom
Take a hall bathroom of about 40 square feet. The all-layers budget from Section 2 (70–80 lumens per square foot) gives roughly 3,000 lumens to spend. Spend it as: about 900 lumens of ambient recessed light; two sconces at 60–66 inches, spaced 36–40 inches apart, splitting a 1,500-lumen vanity total; one 600-lumen wet-rated fitting in the shower; and a toe-kick or under-vanity strip on a sensor for the night layer. The working layers share one Kelvin (3,500K sits mid-range); the night strip runs 2,700K, as Section 7 sets out. Three controls run it: a dimmer for ambient, a switch for the vanity, the sensor for the night. Every figure is arithmetic on this guide’s own stated guidelines — your room’s numbers scale from its square footage the same way.
10. No-Rewire Layers: Renters and Small Bathrooms

Layers are a logic, not a wiring diagram, and the logic survives renting intact — as the light section of our renter-friendly bathroom updates ideas sets out: warm bulbs in the existing fixture become the ambient layer, plug-in or rechargeable sconces flank the mirror as the task layer, adhesive LED strips supply accent and night. Nothing is wired, everything is layered, and the deposit never hears about it.
Small bathrooms benefit disproportionately: with so little wall, each layer is close to every other, so even battery fixtures cross-fill pleasantly. The discipline that remains is §8’s — one Kelvin across every device, including the plug-ins — and §9’s, approximated with smart bulbs on schedules where switches cannot change.
Frequently Asked Questions About Bathroom Lighting Layers
What are the layers of bathroom lighting?
Ambient (general ceiling fill), task (focused light at the mirror and shower), accent (glow for depth — niches, under-vanity strips), plus the practical night layer. Control is the multiplier: each layer on its own dimmer or switch so the room can run scenes, not just brightness.
How bright should bathroom lighting be in total?
A common planning target is roughly 70–80 lumens per square foot across all layers combined, with the vanity zone the brightest part: around 1,500–2,500 lumens of task light at a single vanity. Dark tiles and tall ceilings push needs up; pale small rooms need less.
Are sconces or an overhead bar better at the vanity?
Sconces, whenever the wall allows: flanking light at face height (about 60–66 inches) cross-illuminates and removes the shadows an overhead bar carves under eyes and chin. A bar is the fallback — choose it wide and frosted, and pair it with ceiling light near the vanity to fill its shadows.
What colour temperature is best for a bathroom?
One consistent temperature room-wide: 3000–4000K is the honest working range, with warmer ambient (2700–3000K) for spa-style rooms and the vanity kept neutral for accurate colour. The failure to avoid is mixing temperatures accidentally between fixtures.
Why does CRI matter in a bathroom?
The colour-rendering index decides whether skin, makeup and hair colour read true at the mirror. Specify CRI 90+ for vanity fixtures and bulbs; lower-CRI light can make a well-lit face look wrong, which no amount of extra brightness fixes.
Do I need a light inside the shower?
It is one of the highest-value upgrades: showers block the room’s light, so a sealed wet-rated recessed light improves safety, cleaning and how the tile looks. Over tubs, use damp-rated fixtures at code clearances. Never put a non-rated fixture in a wet zone.
Can I layer lighting without rewiring?
Yes — bulbs set the ambient, plug-in or rechargeable sconces make the task layer, adhesive strips make accent and night layers, and smart bulbs add dimming and scenes. Renters can run the full logic with zero wiring; the only discipline left is matching colour temperature across devices.
Where should accent lighting go in a bathroom?
Under a floating vanity (toe-kick), inside the shower niche, behind a mirror, or along a shelf — anywhere a low, warm glow separates surfaces and adds depth. Accent is not for tasks; keep it warm, dimmable and temperature-matched to the room.
How many switches does a layered bathroom need?
Ideally three: ambient, task, and accent/night — each dimmable where possible. Two is workable (task separate, the rest together). One switch for everything undoes the layering, because the room can then only be all-on or all-off.
What is the cheapest lighting upgrade for a bathroom?
Bulbs and a dimmer. Matched warm-neutral, high-CRI bulbs in every existing fixture unify the room’s colour, and a dimmer on the main switch gives the existing lights a second, evening personality — together they cost less than one new fixture.
What IP rating do bathroom lights need?
It depends on the zone: inside the bath or shower tray (Zone 0) calls for IP67; above the bath or shower (Zone 1) and the band around them (Zone 2) call for IP44 or above, as widely used guidance states it. US listings say the same thing differently — wet-location fittings inside the spray, damp-location in the steam zone. When in doubt, have a qualified electrician confirm the rating for the exact position.
Conclusion
Bathroom light fails as a solo and works as an ensemble: ambient to fill, task at face height to flatter, a rated light in the wet zone, accent for depth, a whisper for the night — all one colour temperature, all separately controlled. Plan the layers before the fixtures and even a small, rented, one-window bathroom can have light that behaves like it was designed. Because it was.


Pingback: Kitchen Island Lighting Ideas: Heights, Counts & Spacing Rules
Pingback: Arch Mirror Over Double Vanity: Widths, Spacing & Light