
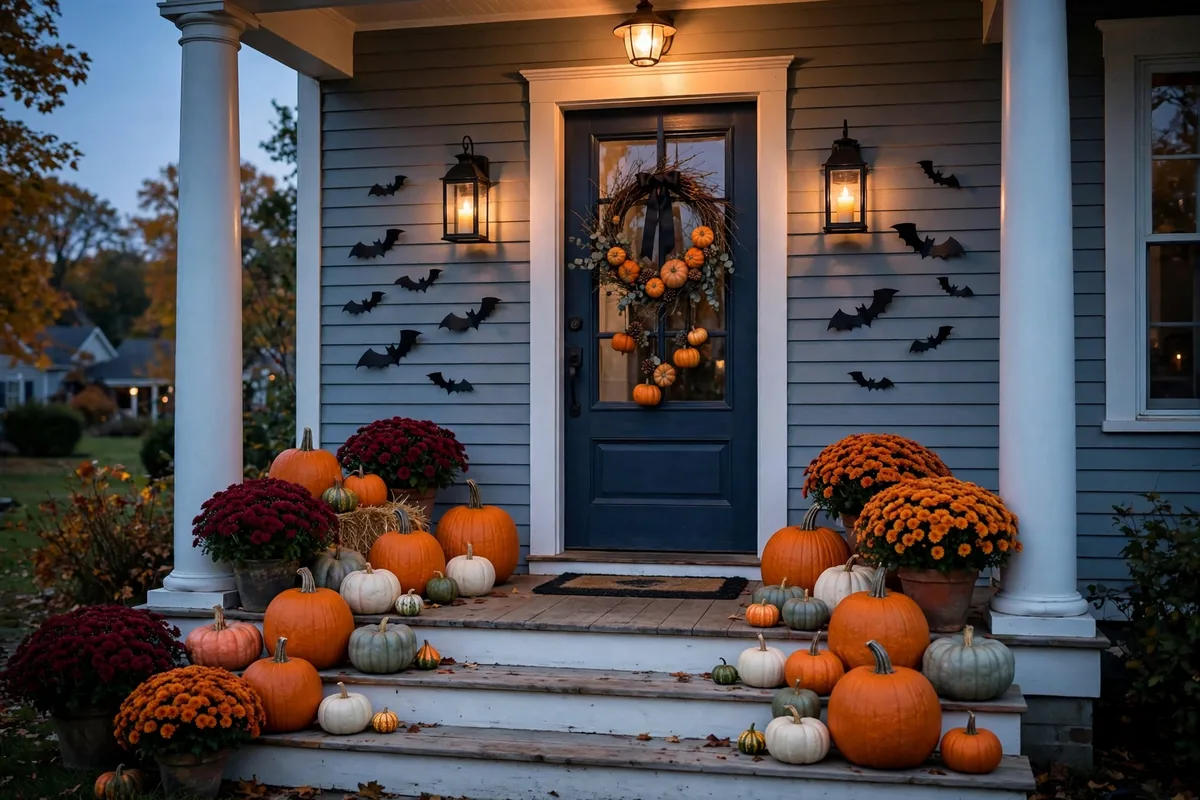
Your front porch is the first thing trick-or-treaters and neighbours see on Halloween night, and it has two jobs at once: it should feel spooky enough to be fun, and clear, lit and welcoming enough that a small child in a costume can walk up safely. The good news is that you do not need inflatables covering the lawn or a professional set designer. A strong porch display is built in layers — a clean walkway, pumpkins at different heights, one wreath, warm light, and one or two character pieces — and most of it can go up in a single afternoon.
This guide walks through the whole porch in the order you would build it, from the steps to the door to the candy station at the end. If you are also planning the pumpkins themselves, start with our creative pumpkin carving ideas and then come back here to arrange them.
In this guide: Front Porch Halloween at a Glance · Start With a Clean, Safe Walkway · Build a Pumpkin Steps Display · Hang a Wreath That Sets the Tone · Light It With Lanterns and Flameless Candles · Add Mums and Fall Planters for Colour · Choose One Character Piece, Not Ten · Layer the Doormat and Door Surround · Hang Bats or Silhouettes Under the Porch Cover · Make a Cozy Corner for Grown-Ups · Finish With a Clear Candy Station · How Much Does a Front Porch Halloween Display Cost? · Frequently Asked Questions About Front Porch Halloween Decor · Conclusion
Front Porch Halloween at a Glance
| Layer | What to Add | Why It Works |
|---|---|---|
| Base | Swept steps, clear walkway, working porch light | Safety first, and every decoration looks better on a clean base |
| Height | Pumpkins stacked on steps, crates and planters | Creates the full, abundant look without buying more items |
| Focus | One wreath or door treatment | Gives the eye a single clear focal point at the door |
| Light | Lanterns with flameless candles, warm string lights | Glow reads as “welcome” and keeps real flames away from costumes |
| Character | One skeleton, ghost or bat accent | Personality without turning the porch into a storage unit |
| Finish | Candy station and a clear path to the bell | The porch has to work, not just photograph well |
1. Start With a Clean, Safe Walkway

Before a single pumpkin comes out, sweep the steps, move bikes and bins out of the path, and check that the porch light works. Halloween is the one night of the year when dozens of children — many in masks that limit their vision and costumes that trail — will walk this route in the dark. A decoration that trips a visitor is not a decoration, it is a hazard.
Keep a route at least a metre wide completely clear from the pavement to the doorbell. Decorations belong on the edges of steps, in corners, and on railings, never in the walking line. This clean base is also a design choice: a swept porch with clear edges makes every layer you add next look deliberate instead of cluttered, the same principle that makes small patio ideas work in tight outdoor spaces.
2. Build a Pumpkin Steps Display
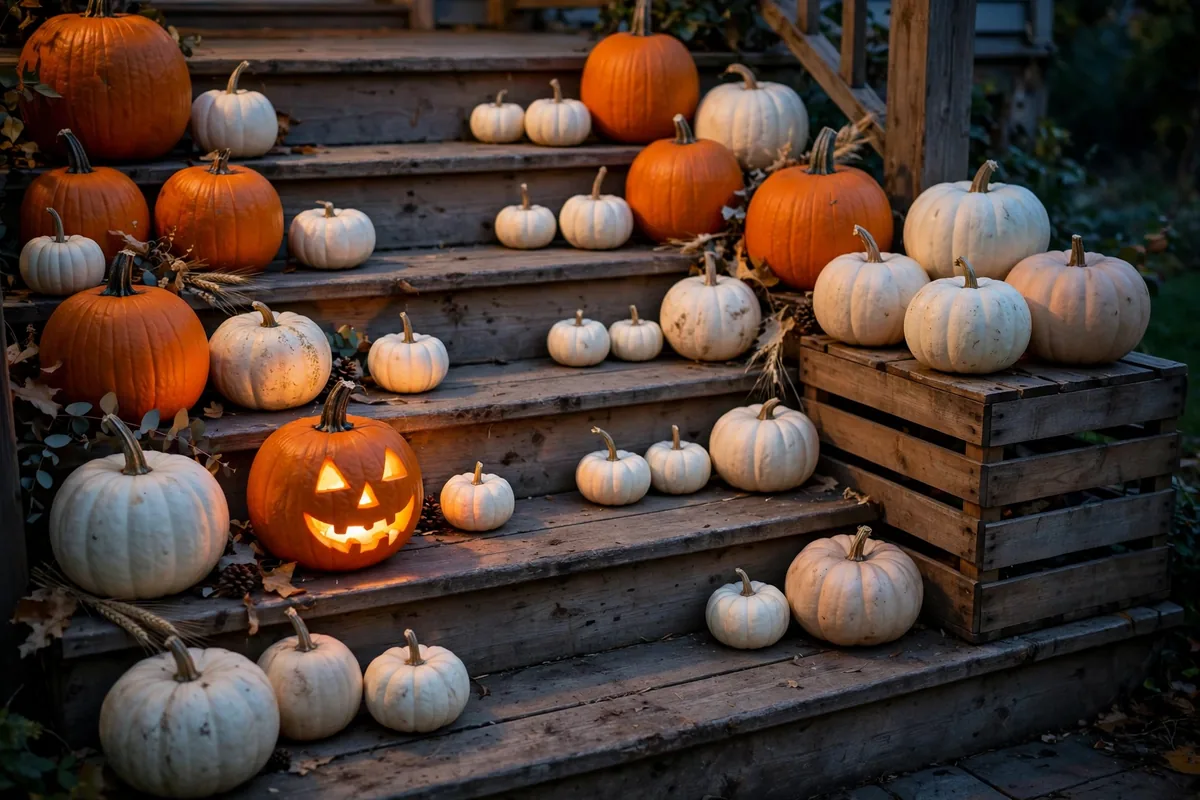
Steps are natural shelves, and pumpkins are the easiest way to fill them. Mix sizes — a few large pumpkins as anchors, medium ones to fill, and small ones tucked into gaps — and vary the colour: classic orange with a few white or pale “ghost” pumpkins mixed in looks richer than a single shade repeated. Leave the centre of each step clear so feet have somewhere to land.
Group pumpkins in odd numbers and at uneven heights. Turn one or two crates upside down at the side of the steps to create an extra level, and place a carved pumpkin where it can be seen from the street. Uncarved pumpkins last far longer, so carve only the one or two that act as lanterns and keep the rest whole — they will carry through to a general autumn display after Halloween ends. For ways to finish those whole pumpkins — paint, fabric, ribbon and the rest — see our no-carve pumpkin styling ideas.
3. Hang a Wreath That Sets the Tone
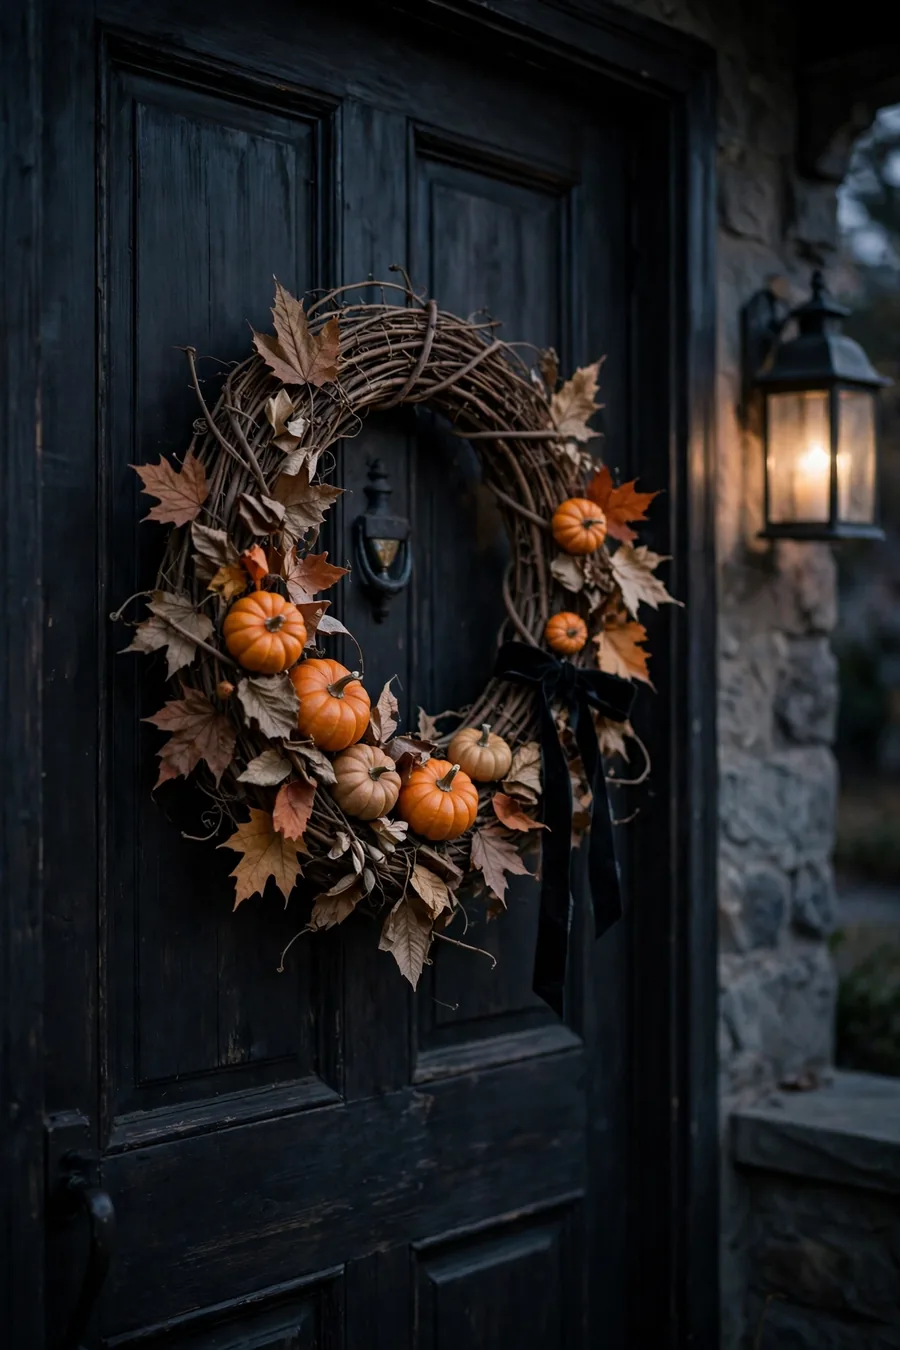
The door is where every visitor’s eyes land, so treat the wreath as the headline of the whole display. A grapevine or twig wreath dressed with black ribbon, dried leaves and a few mini pumpkins suits almost any house colour, while an all-black wreath with a single orange bow reads more modern. Choose one style and let it set the palette for everything else on the porch.
Hang the wreath at eye level — roughly centred on the door — and check it from the street, not just from the doorstep. If the door has a glass panel, a wreath hung inside the glass still shows through and stays protected from weather. For more door-first inspiration, HGTV’s quick and easy Halloween front porch update shows how much difference a single door treatment plus lanterns can make in under an hour.
4. Light It With Lanterns and Flameless Candles
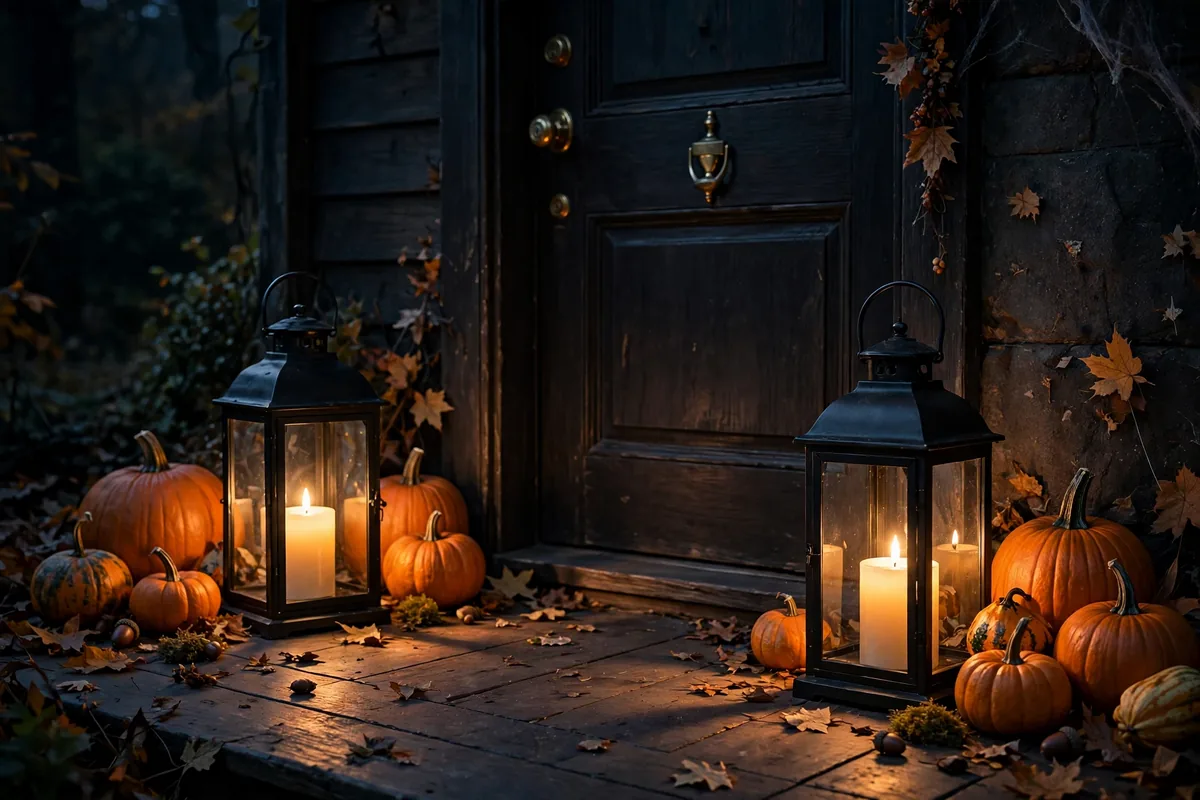
Light does more for a Halloween porch than any prop. Place a pair of lanterns on either side of the door, add one at the bottom of the steps to mark the entrance, and use battery-operated candles or glow sticks inside pumpkins instead of real flames. Warm-white light keeps the mood welcoming; orange string lights along a railing add the Halloween note without turning the house purple.
This is also the safety choice. The NFPA’s Halloween fire safety tips recommend battery-operated candles in jack-o’-lanterns and keeping dried decorations such as cornstalks and crepe paper well away from any open flame or heat source. Flameless candles also survive wind and rain, so your display still glows at 9 p.m. on a blustery night when real candles would have blown out hours earlier.
5. Add Mums and Fall Planters for Colour
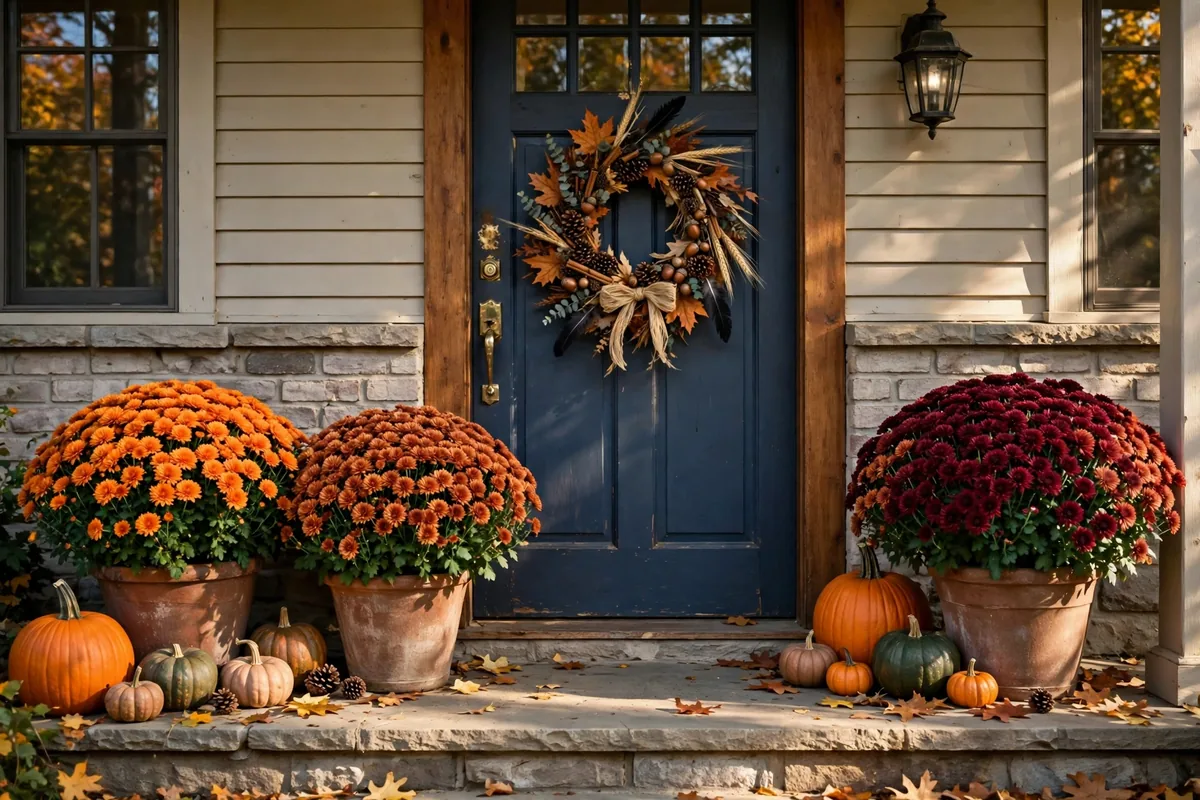
Pumpkins give you orange; mums give you everything else. Pots of burgundy, rust, gold and deep purple mums flanking the door fill the gaps pumpkins leave, soften hard edges, and keep the porch looking good in daylight — when most Halloween props look a little tired. Keep plants in their nursery pots dropped inside your nicer planters so you can swap them out easily.
Water mums from the base and keep them out of harsh afternoon sun and they will last for weeks, easily outliving Halloween and carrying the porch through the rest of autumn. When a mum fades, move a healthy one forward rather than buying more — the same rotate-and-refresh habit that keeps indoor plants looking full applies outdoors too.
6. Choose One Character Piece, Not Ten
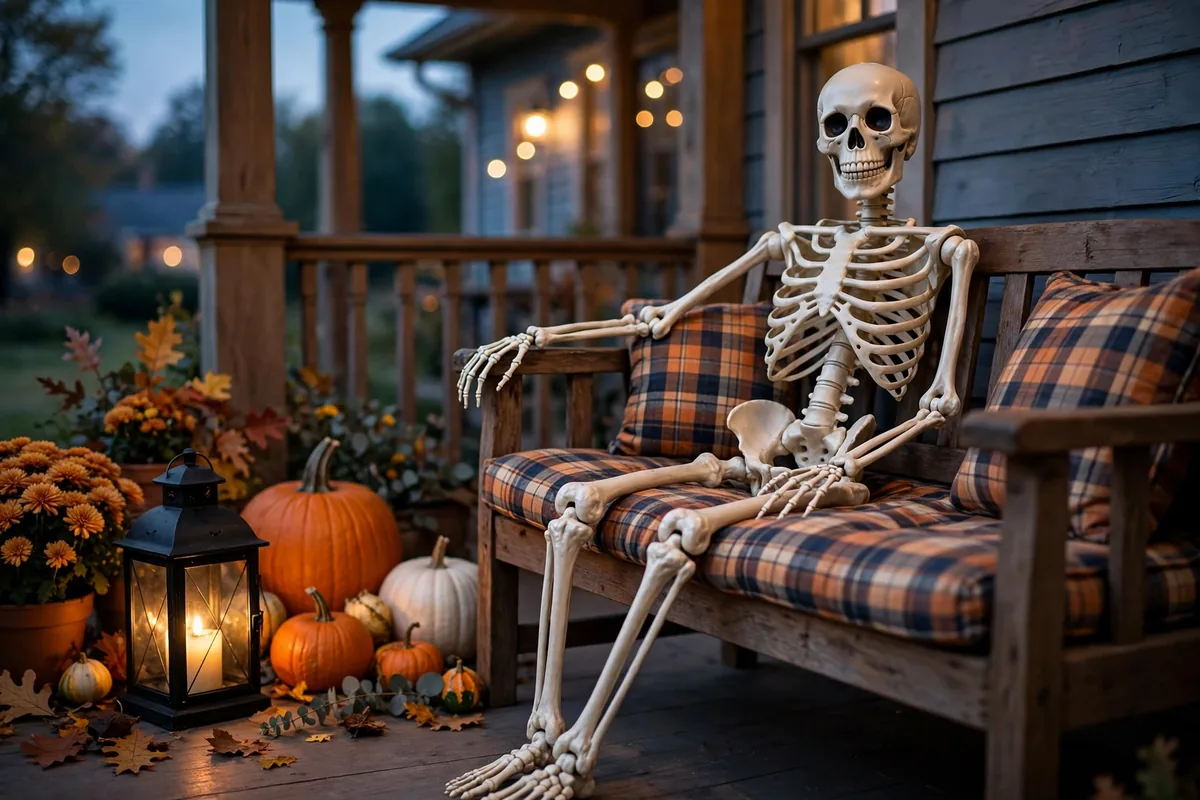
One character gives a porch personality; ten give it a storage problem. Pick a single piece that fits your audience — a seated skeleton on the bench, a sheet ghost in the corner, or a witch’s hat and boots by the door are all friendly enough for young children while still reading clearly as Halloween from the street. Position it off to one side, at an angle, as if it lives there.
Resist filling every remaining gap. Negative space is what makes the character noticeable. If you already own several props, rotate them by year instead of displaying everything at once — next year’s porch then feels new without a single new purchase.
7. Layer the Doormat and Door Surround
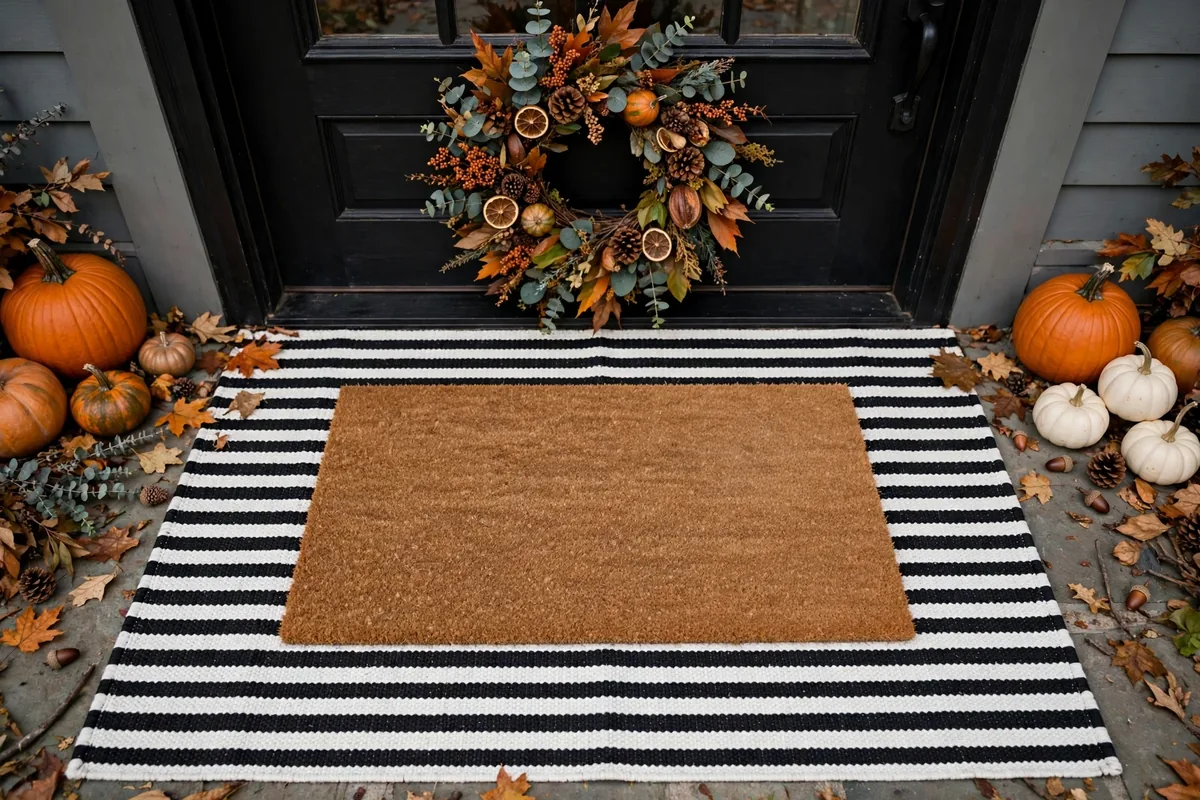
A layered doormat is a small detail that makes the whole doorway look finished. Put a larger, washable flat-weave rug in a black-and-white stripe or check under a standard coir mat — plain, or with a short Halloween greeting — so the top mat is framed by a border on all sides. It takes two minutes and photographs like you planned the porch for weeks.
Frame the door itself, too. A simple garland of faux autumn leaves or black paper bats along the door surround draws the eye upward and connects the wreath to the rest of the display. Keep anything hanging well clear of the door’s swing and the hinges, and use removable hooks so November-you is not repairing paint.
8. Hang Bats or Silhouettes Under the Porch Cover
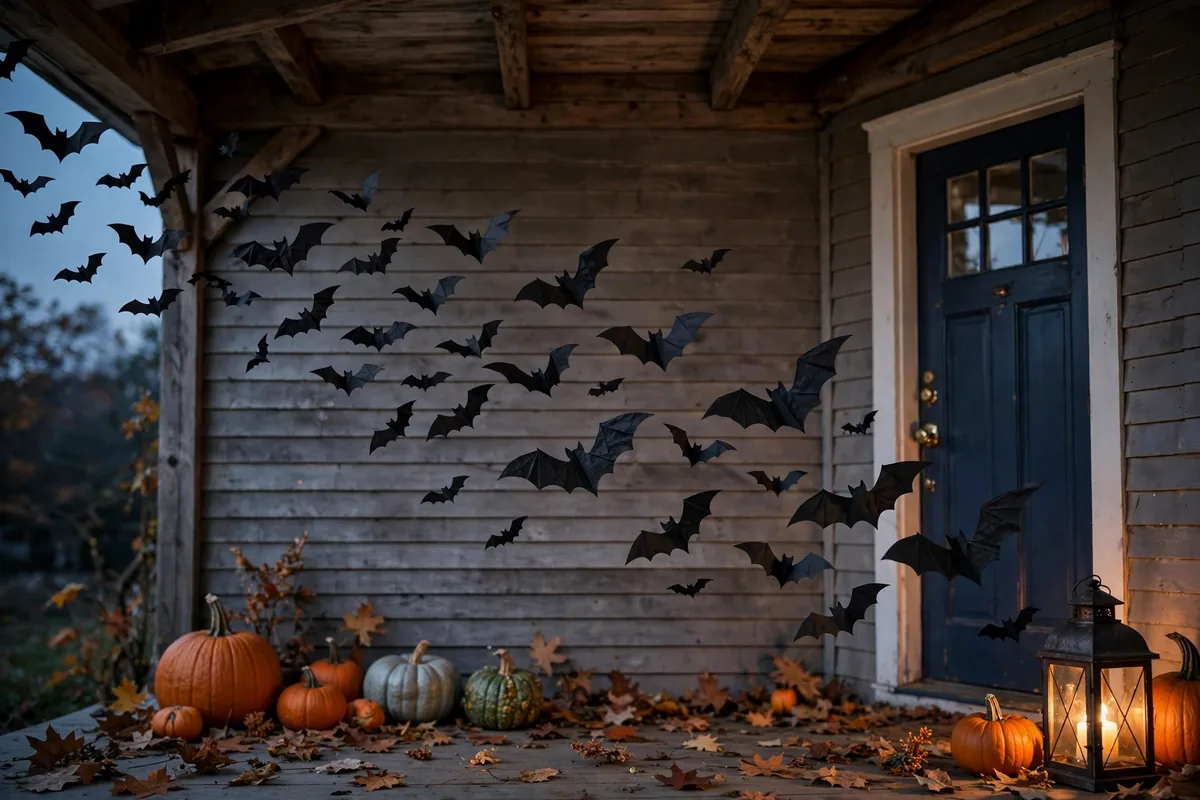
A swarm of simple black bats flying up one side of the door is one of the cheapest and most effective porch decorations there is. Cut bats in three sizes from black card, fold each one slightly along the body so the wings lift off the wall, and stick them with removable putty in a loose diagonal — small bats low and close together, larger ones higher and more spread out, all heading the same direction.
Paper bats belong under a covered porch; on an exposed wall, cut them from thin plastic or craft foam instead so one rainy night does not end the display. Window silhouettes — a black cat, a witch, a row of tombstones cut from card and taped inside a lit window — give the same effect from the street with even less weather risk.
9. Make a Cozy Corner for Grown-Ups
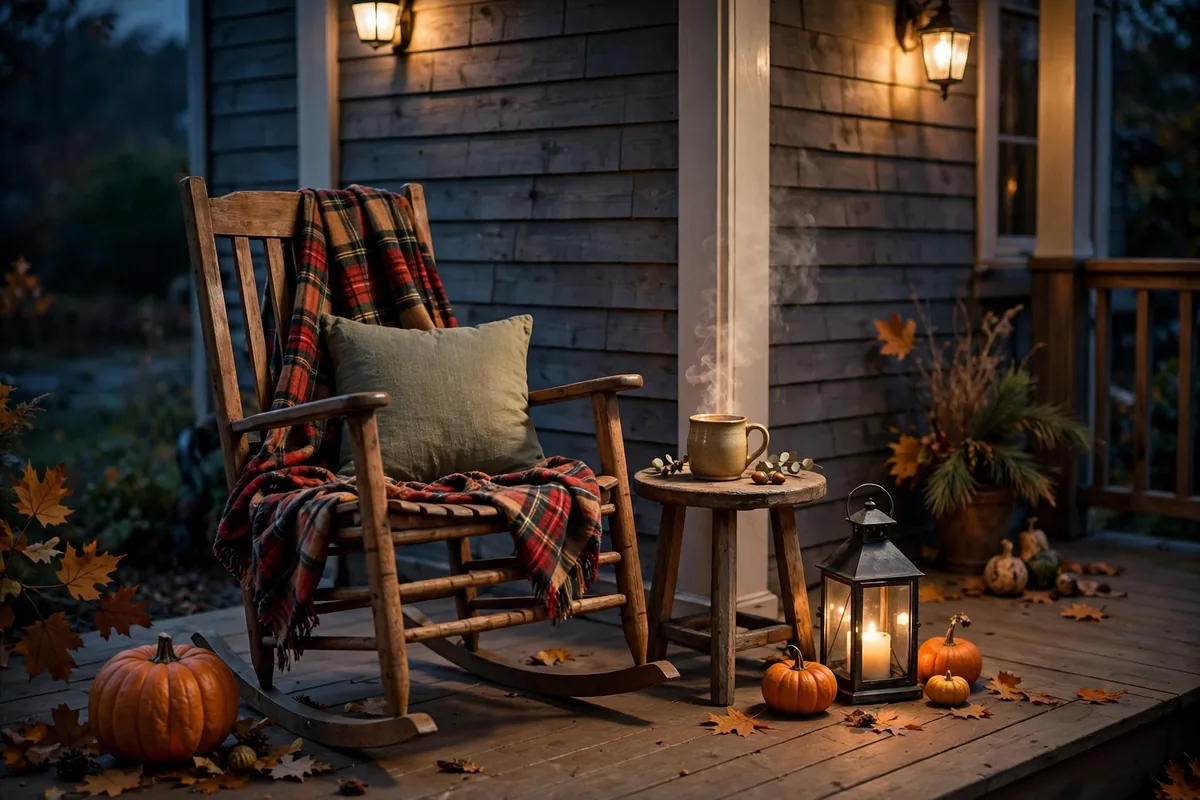
If your porch has a chair or bench, style it for the adults who will sit out with the candy bowl. A plaid or dark throw over the chair, one cushion, and a small side table for a warm drink turn “handing out candy” into an pleasant evening post — and a seated, relaxed greeter is far less startling to small children than a figure looming in a dark doorway.
This corner is also where your one character piece can sit if you are not handing out candy yourself. The styling overlaps with the wider outdoor work in our backyard landscaping ideas and the firelight mood of these stylish outdoor fireplaces — warm layers, natural textures, one glow source.
10. Finish With a Clear Candy Station
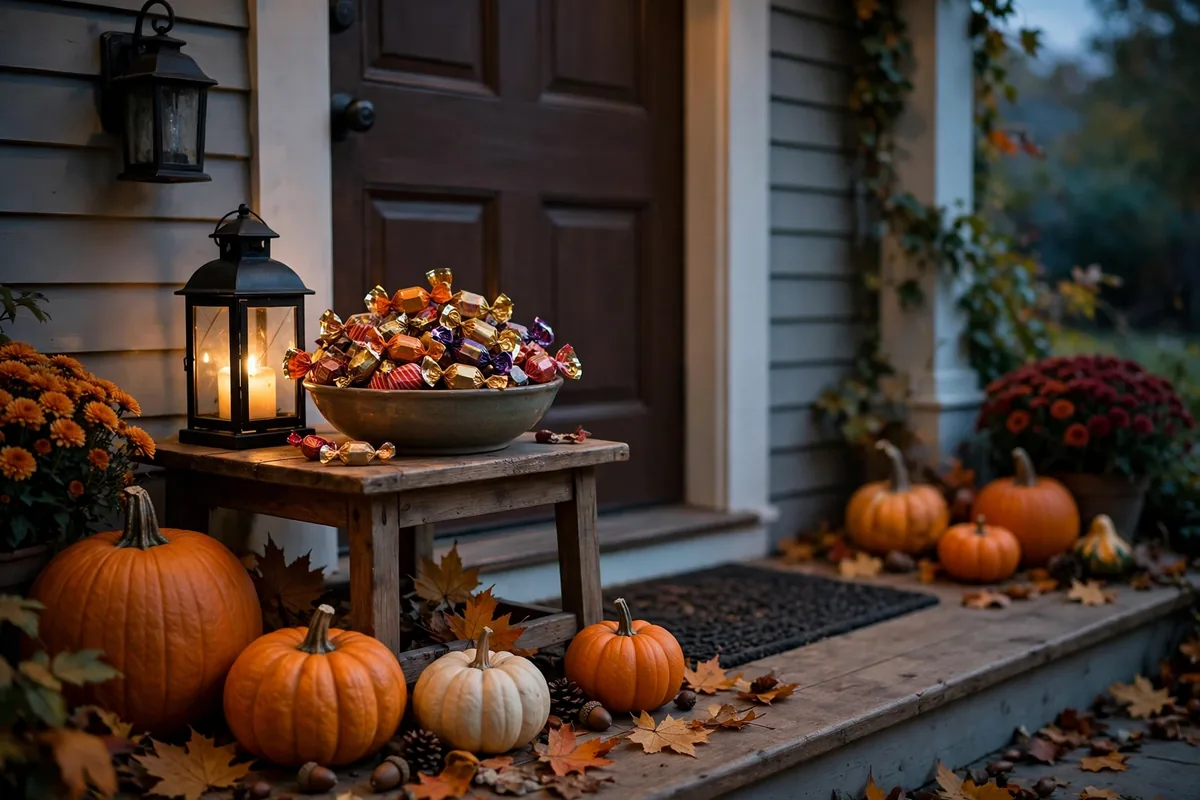
End the build where the visitor’s journey ends: the candy. A bowl on a small table or sturdy crate beside the door — not on the ground — is easier for small hands, keeps candy off wet steps, and lets you sit or step back instead of crowding the doorway. Add a lantern beside it so children can see what they are choosing.
If you will be out trick-or-treating with your own family, a self-serve bowl with a friendly “Please take one” sign on a lit porch works honestly in most neighbourhoods. Either way, do a final walk-through at dusk on the day itself: light on, path clear, candles glowing, bowl filled. That five-minute check is the difference between a porch that looks good in a photo and one that works all night.
How Much Does a Front Porch Halloween Display Cost?
| Approach | Typical Items | Notes |
|---|---|---|
| Use what you have | Crates, lanterns, throws, existing planters + pumpkins and mums | The plants and pumpkins are the only essential spend |
| Small refresh | Above, plus a wreath, layered mat and flameless candles | Everything here stores flat and reuses for years |
| Full display | Above, plus one character piece and string lights | Buy the character once, at the end-of-season sale if you can wait |
Prices vary too much by store and region to quote honestly, so use the table as a shopping order instead: plants and pumpkins first because they are perishable and sell out, reusable hard goods second, and single-use novelties last — or never.
Frequently Asked Questions About Front Porch Halloween Decor
When should I decorate my front porch for Halloween?
The first weekend of October is the sweet spot. Pumpkins and mums bought then still look fresh on the 31st, and you get a month of enjoyment from the work. Add carved pumpkins only in the final week, because a carved pumpkin typically lasts just a few days outdoors.
How long do uncarved pumpkins last on a porch?
A healthy, uncarved pumpkin kept dry and off bare soil commonly lasts several weeks, often from early October past Halloween. Choose pumpkins with no soft spots or cuts, and set them on a mat, crate or step rather than damp ground.
How do I decorate a small front porch for Halloween?
Think vertically and keep the footprint tiny: a wreath on the door, one stack of pumpkins in a corner, a lantern pair, and a layered mat. Skip floor-standing characters entirely and use bats or a window silhouette to add the Halloween note without using any floor space.
How can I make my porch spooky but still kid-friendly?
Keep the porch light on, use warm rather than strobing light, avoid jump-scare sound effects and gore, and choose smiling pumpkins, friendly ghosts and seated characters over standing figures in the doorway. If a decoration would make a four-year-old cry, move it to the garden instead.
Are flameless candles better than real candles for a porch?
For most porches, yes. Flameless candles cannot blow out, cannot ignite dried leaves, cornstalks or costumes, and can be left on a timer for the whole evening. Fire-safety guidance recommends battery-operated candles or glow sticks inside jack-o’-lanterns for exactly these reasons.
What if my porch has no cover or roof?
Choose weatherproof materials: plastic or foam bats instead of paper, outdoor-rated string lights, lanterns with sealed battery compartments, and pumpkins and mums, which do not mind rain at all. Bring fabric items like throws and cushions in each night, or skip them.
How do I keep trick-or-treaters safe on my steps?
Keep a clear path at least a metre wide, keep steps free of decorations in the centre, light the route from the street to the door, secure any cords flat against walls or edges, and keep exits and doorways completely clear of props.
What colours work best for a Halloween porch besides orange and black?
White and pale pumpkins with black accents give a modern, calm look; burgundy, plum and gold mums add depth next to orange; and natural wood, straw and dried grasses warm everything up. Pick one palette and repeat it three or four times across the porch.
How do I store Halloween porch decorations for next year?
Photograph the finished porch before you take it down so you can rebuild it in minutes. Store bats and garlands flat in a labelled box, remove batteries from flameless candles and lanterns so they do not corrode, and wash throws before packing them away.
Can I transition the same porch from Halloween to general fall decor?
Yes — that is the smartest reason to build in layers. Remove the bats, character piece and any Halloween-specific signs on November 1st, and the pumpkins, mums, lanterns, wreath base and layered mat that remain read simply as autumn until you are ready for a winter or Christmas version.
Conclusion
A great front porch Halloween display is not about owning the most decorations. It is a clear, safe path, pumpkins with height, one confident wreath, warm flameless light, and a single character with room to breathe. Build it in that order this weekend, check it once at dusk, and your porch will be the one on the street that families remember — for the right reasons.



Pingback: 12 Subtle Halloween Living Room Ideas (Elegant, Never Cheesy)
Pingback: No Carve Pumpkin Styling Ideas: 10 That Last All October